ЖИ көмекші


Материалдарды шектеусіз жүктеңіз ҚМЖ, ашық сабақтар, презентациялар, көрнекіліктер, дидактикалық материалдар, авторлық бағдарламалар және тағы басқа 400 000-астам материалды шексіз жүктеп алғыңыз келе ме?
Толығырақ
Толығырақ
Тақырып бойынша 11 материал табылды
Коучинга для преподавателей «Применение методологии CLIL при проведении уроков ЕМЦ»
Материал туралы қысқаша түсінік
Данный материал будет полезен для преподавателей, которые начинают преподавать информатику на английском языке.
Материалдың қысқаша нұсқасы


 Жүктеу
Бөлісу
ЖИ арқылы жасау
Файл форматы:

pdf

30.10.2019

318
Жүктеу
ЖИ арқылы жасау
Бұл материалды қолданушы жариялаған. Ustaz Tilegi ақпаратты жеткізуші ғана болып табылады. Жарияланған материалдың мазмұны мен авторлық құқық толықтай автордың жауапкершілігінде. Егер материал авторлық құқықты бұзады немесе сайттан алынуы тиіс деп есептесеңіз,
шағым қалдыра аласыз
шағым қалдыра аласыз
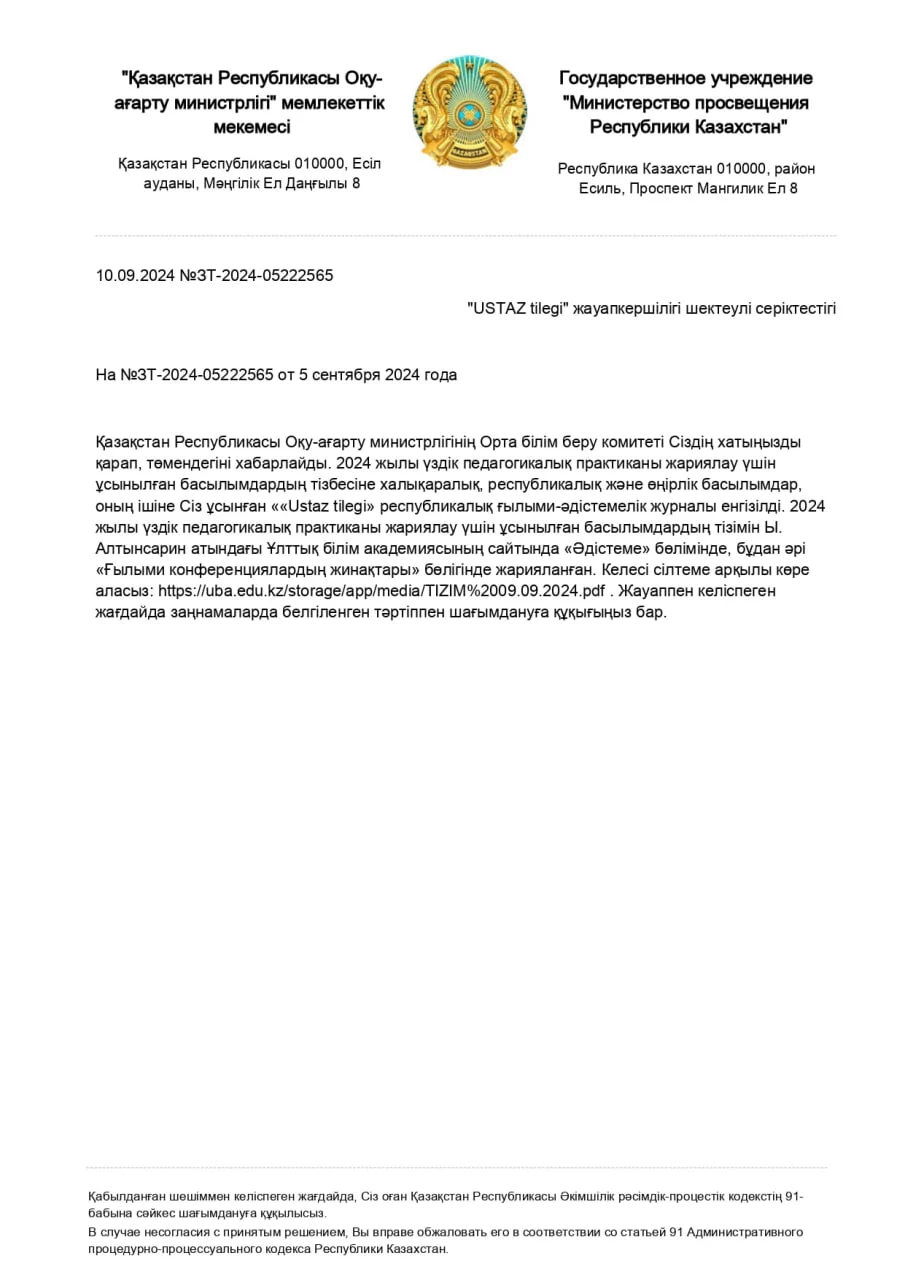
 Бұл курс Қазақстан Республикасы Оқу-ағарту министрлігімен келісілген