Ахметова Аяжан
Ахметовна
«Organizing English lessons
for Primary School
Students»
Алматы
2025жыл
ӘОЖ 373
КБК 74.268
Пікір жазған:
М. Х. Дулати атындағы Тараз
өңірлік университеті, филология ғылымдарының кандидаты,
қауымдастырылған профессоры
Н.Б.Есенова
С.С
Жанибекова Қызылорда қаласы Болашақ университетінің «Арнайы педагогика
және психология» кафедрасының аға оқытушысы, п.ғ.к., Облыстық білім
басқармасының балалар оңалту орталығының түзету маманы, РЖА
профессоры
Педагогика тарих ғылымдарының
магистрі Абиева Ұ.Б.,
Халықаралық ғылым мен білімді
қолдау орталығы «Bilim_gilim»
әдістемелік кеңес мәжілісінде талқыланып,
2025 ж. «19» наурыз №001/0160 хаттамасымен мақұлданған және баспаға
ұсынылған.
Ахметова
А.А
«Organizing English lessons
for Primary School Students»
Алматы: 2025 (ZIALY
Baspasy)
ISBN
Аңдатпа
Аталған авторлық жұмыс оқу
бағдарламасына негізделе үлгілік бағдарламамен сабақтастықты ескере
отырып құрастырылған.Білім –тәрбие беру кезеңінде саналы, дұрыс,
комуникативті оқу дағдыларын жетілдіру, логикалық қабылдауды
дамыту, функционалдық сауаттылықтарын арттыру пәнге деген
қызығушылықты, зерттеушілік қабілетті дамытып қалыптастыруға
бағытталған авторлық жұмыс білім беру стандартының пәндік
тақырыптарының мазмұнын, оқу сағаттарын курс бөлімдері арасында
бөлуді, сонымен қатар пәнаралық байланыстарды ескере отырып, пәндер
мен пән бөлімдерін зерделеудің ұсынылатын тәртібіне негізделе
отырып құрастырылған.
Аннотация
Данная авторская работа составлена с учетом
преемственности с типовой программой, основанной на учебном плане.В
период обучения авторская работа направлена на развитие и
формирование интереса к предмету, исследовательской способности,
содержания предметных тем образовательного стандарта, распределения
учебных часов между разделами курса, а также межпредметных связей с
учетом, исходя из рекомендуемого порядка изучения предметов и
предметных разделов.
Abstract
This author's work is compiled
taking into account continuity with the standard program based on
the curriculum.During the training period, the author's work is
aimed at developing and shaping interest in the subject, research
ability, the content of subject topics of the educational standard,
the distribution of teaching hours between sections of the course,
as well as interdisciplinary connections, taking into account,
based on the recommended order of studying subjects and subject
sections.
ISBN
©
Ахметова
А.А
Explanatory note
Teaching English to primary
school students is both an exciting and challenging endeavor. At
this early stage, children typically possess a natural curiosity
and willingness to learn, yet they also require carefully
structured activities and age-appropriate content to keep them
engaged. An effective lesson plan for young learners must take into
account several key components: clear objectives, relevant content,
interactive teaching methods, a supportive classroom environment,
and continual assessment that fosters growth. By paying close
attention to these areas, teachers can create meaningful,
enjoyable, and successful English language lessons for children.
The following essay discusses the essential considerations and
practical strategies for organizing English lessons in primary
school, emphasizing a balanced, student-centered approach that
nurtures language development and instills a lifelong love of
learning.
1. Setting Clear
Objectives
Before designing any English lesson for primary
school students, it is critical to establish clear objectives.
Objectives provide a roadmap for the teacher and give learners a
sense of purpose. For instance, an objective might be “By the end
of this lesson, students will be able to identify and name at least
ten common household objects in English,” or “Students will be able
to use basic greetings and introduce themselves to others.”
Objectives should be specific, measurable, attainable, relevant,
and time-bound (SMART). When the goals are well-defined, students
and teacher alike can focus on accomplishing them systematically.
Moreover, clarity in objectives supports ongoing assessment and
helps measure progress effectively.
2. Understanding Developmental
Stages
Primary school students typically range from ages
five to eleven (though exact age spans differ across educational
systems). During these years, children experience rapid cognitive,
social, and emotional development. They learn best through play,
exploration, repetition, and concrete experiences. Teachers must
bear these developmental characteristics in mind when organizing
lessons. Young learners have shorter attention spans and may
struggle to concentrate on lengthy lectures or abstract
explanations. Therefore, it is crucial to incorporate hands-on
activities, visuals, and interactive elements that capture their
interest. Adjusting the difficulty level and type of activities to
match the students’ developmental stage not only enhances
motivation but also ensures a more effective learning
process.
3. Creating a Positive Classroom
Environment
An inviting, positive classroom environment helps
foster engagement and cooperation. Young learners thrive in spaces
where they feel safe, relaxed, and motivated to try new things.
Simple strategies such as greeting students warmly at the door,
decorating the classroom with colorful posters, and establishing
clear classroom rules set the tone for a welcoming setting.
Children should feel that their attempts at speaking English are
encouraged and that mistakes are natural parts of the learning
process. By consistently offering praise, constructive feedback,
and gentle correction, teachers can boost students’ confidence and
motivate them to participate actively in the lesson. Incorporating
group work or pair work can also foster collaboration, allowing
students to practice their language skills with peers while
building social connections.
4. Designing Engaging Lesson
Content
Effective lesson content for primary school
English classes should be relevant, fun, and attainable. Units
often revolve around familiar themes such as family, animals,
colors, numbers, weather, and basic daily routines. These themes
are relatable and help students connect their new language skills
to their everyday lives. Including stories, songs, rhymes, and
short role-plays engages young learners in a multisensory manner.
Students tend to remember new vocabulary better when it is
presented within a context that resonates with their own
experiences. By using realia (physical objects) like fruit, toys,
or classroom items, teachers can offer concrete references that
make language input more meaningful.
5. Varying Teaching Methods and
Activities
Young learners frequently lose
interest if the lesson structure remains repetitive or monotonous.
Hence, it is essential to implement a variety of teaching methods
and activities that keep them active and
intrigued. Some effective methods
include:
-
Total Physical Response
(TPR): Students respond physically to
commands, such as “Stand up,” “Sit down,” or “Jump.” This method
taps into kinesthetic learning and helps students link actions with
vocabulary.
-
Storytelling:
Children love stories.
Incorporating short, interactive stories (with visuals or puppets)
introduces vocabulary and grammar in a narrative context. Students
can participate by predicting story outcomes or echoing key
phrases.
-
Songs and
Chants: Music and rhythm help make
language memorable. Simple songs or chants with repetitive phrases
allow children to practice pronunciation and intonation without the
pressure of individual speaking.
-
Games and
Competitions: Games like “Simon Says,”
vocabulary matching, or charades spark excitement. Competition can
be a strong motivator, though it is important to keep it friendly
and supportive so that no child feels left
behind.
-
Art and
Crafts: Activities like drawing,
coloring, or making collages related to the lesson’s theme provide
creative outlets for students to apply newly learned
vocabulary.
By mixing activities that target different
learning styles—auditory, visual, and kinesthetic—teachers can
reach a broader range of students, ensuring that each child has an
opportunity to engage with the material in a way that suits their
preferences.
6. Incorporating Technology (Where
Appropriate)
In many modern classrooms, technology has become
a valuable ally in language teaching. Interactive whiteboards,
educational apps, or short video clips can bring variety to the
lesson, reinforce key vocabulary, and cater to tech-savvy
children’s interests. For instance, teachers might use animated
videos that demonstrate dialogues or highlight vocabulary in
entertaining contexts. Alternatively, digital flashcards and online
games can help reinforce spelling and pronunciation. However, it is
crucial to maintain a balance. While technology can be a powerful
supplement, it should not overshadow hands-on, face-to-face
interaction, especially with younger students who need to develop
social and communication skills in a physical
environment.
7. Managing Classroom
Behavior
Classroom management is a fundamental aspect of
organizing English lessons for primary students. Children this age
can be restless, chatty, or easily distracted, especially when the
lesson is taught in a second language. To maintain a productive
atmosphere, teachers should establish routines early on. Clear
signals for transitions (e.g., clapping patterns, chimes, or short
rhythmic phrases) help students anticipate changes in activity.
Creating a simple reward system, such as stickers, star charts, or
“English points,” can provide positive reinforcement. Reminding
students of class rules—listening, respecting each other’s turns,
speaking softly—keeps them mindful of acceptable behavior. Above
all, consistency and fairness are key; children thrive when they
know what to expect and understand the consequences of their
actions.
8. Fostering Interaction and
Communication
One of the chief goals of an English lesson is to
encourage students to communicate. Even at a very basic level,
teachers can involve children in question-answer patterns, short
dialogues, and group discussions. Simple routines—like asking each
other about favorite foods, colors, or how they feel—stimulate
speaking in a non-threatening manner. Pair work allows students to
practice with a partner, reducing the anxiety of speaking in front
of the entire class. Role-playing real-life scenarios—such as
buying groceries, visiting a zoo, or talking about the
weather—helps learners see the immediate utility of their language
skills. The teacher’s role is to guide and model correct usage,
offering corrections sensitively and consistently so that students
grow in accuracy and fluency.
9. Ongoing Assessment and
Feedback
Assessment in a primary classroom should be both
formative and summative, providing teachers with insights into each
student’s progress, strengths, and areas needing improvement.
Formative assessment includes observing children during activities,
listening to their oral responses, and checking written work (where
applicable) to identify misunderstandings early on. Summative
assessments, such as end-of-unit quizzes or simple projects, help
measure overall mastery of skills and knowledge. However, with
young learners, it is essential that assessments be
non-intimidating and supportive. Simple tasks like drawing a
picture based on a spoken description, matching pictures to words,
or verbally naming items are often more suitable than formal
written tests at this level. Regular, constructive
feedback—focusing on what was done well and what can be
improved—encourages children to keep trying and reduces the fear of
making mistakes.
10. Integrating Cultural
Elements
When organizing English lessons, introducing
cultural components can be highly engaging. Children are naturally
curious about how other people live, celebrate, and speak. Teachers
can weave in simple cultural references from English-speaking
countries—holidays like Halloween, Christmas traditions, or popular
children’s songs—while encouraging students to share their own
cultural practices in English. This approach fosters cultural
awareness, broadens perspectives, and gives a context for the
language. Young learners, in particular, enjoy crafts and festive
activities related to various cultural events, which can
significantly enhance their motivation to learn.
11. Reflecting and
Adapting
Reflective practice is vital for teachers. After
each lesson, it is beneficial to note what worked well and where
challenges arose. If certain activities fail to capture children’s
interest or the pacing felt too slow (or too fast), adjustments can
be made for future lessons. By reflecting regularly on students’
engagement, performance, and feedback, teachers can refine their
approaches to continually improve outcomes. Professional
development workshops, collaboration with colleagues, and staying
updated with new teaching materials also contribute to ongoing
growth.
12. Encouraging Parental
Involvement
Parents can play an instrumental role in their
children’s language development. Encouraging parents to read simple
English stories at home, watch cartoons in English, or ask simple
questions can extend the learning beyond the classroom walls.
Teachers may send home word lists, short reading passages, or
vocabulary games to involve families. Communicating with parents
about the course objectives, upcoming projects, and suggestions for
at-home activities fosters a supportive community for language
learning. As children see that both their teachers and parents
value English, they become more motivated to engage actively with
the language.
Conclusion
Organizing English lessons for primary school
students is an intricate process that hinges on clarity of
objectives, an understanding of children’s developmental stages,
and the creation of an engaging, supportive environment. By
employing varied, interactive methods, integrating technology
sensibly, managing behavior fairly, and encouraging communication
through meaningful tasks, teachers can ensure that young learners
develop a solid foundation in the English language. Ongoing
assessment, reflective practice, and parental involvement further
enhance students’ progress and passion for learning. In the long
term, well-structured, enjoyable lessons inspire children to value
language learning and equip them with vital skills for academic and
personal success. Through a thoughtful and creative approach,
educators can cultivate confident, curious, and motivated English
learners in the primary classroom—and help set the stage for their
continued growth as proficient language users.
Introduction
Organizing English lessons for primary school
students presents a unique opportunity to lay a solid foundation
for lifelong language acquisition. At this developmental stage,
children are naturally curious, energetic, and open to new
experiences. By tapping into their innate enthusiasm, educators can
inspire a love for English that extends well beyond the classroom.
However, success in this venture requires age-appropriate teaching
methods, engaging materials, and a well-structured curriculum that
aligns with both educational standards and children’s developmental
needs.
Goals
-
Language
Mastery: Develop students’ basic
proficiency in English, focusing on vocabulary, pronunciation, and
simple grammar structures.
-
Confidence
Building: Foster a supportive atmosphere
that encourages children to speak, read, write, and listen without
fear of making mistakes.
-
Interactive
Engagement: Promote active participation
through group activities, songs, games, and role-playing, ensuring
that each lesson is enjoyable and
motivating.
-
Cultural
Awareness: Introduce students to aspects
of the cultures of English-speaking countries, broadening their
worldview and cultivating respect for
diversity.
Objectives
-
Equip students with the fundamental linguistic
tools necessary for everyday communication, including greetings,
common expressions, and basic sentence
structures.
-
Strengthen listening skills by using interactive
storytelling, audio clips, and simple
instructions.
-
Develop early reading and writing abilities
through level-appropriate texts, worksheets, and guided
practice.
-
Encourage collaborative learning by integrating
pair work, group tasks, and playful competitions into
lessons.
Relevance
English has become a global medium of communication across various
spheres—academic, professional, and cultural. By introducing
primary students to English at an early age, educators pave the way
for their future academic achievements and global readiness. Early
exposure also enhances cognitive development, improves overall
language sensitivity, and fosters adaptive thinking skills. Thus,
an innovative, well-organized English curriculum at the primary
level is a cornerstone of modern education, aligning with the
growing need for multilingual proficiency in an interconnected
world.
Course Innovation
This course integrates a variety of teaching methods—such as Total
Physical Response (TPR), educational technology tools, and thematic
storytelling—to ensure holistic learning experiences. Lessons are
designed to activate multiple learning styles through visual,
auditory, and kinesthetic activities. By blending traditional
approaches (like flashcards and songs) with modern resources (like
digital apps and interactive whiteboards), the course meets the
varied needs of young learners. Additionally, continuous formative
assessments, reflective practice, and parent-teacher collaboration
are embedded into the curriculum, helping to refine and personalize
instruction.
Expected Results
Upon completion of the course, primary school students will have
gained foundational competency in English, enabling them to
understand and use simple words, phrases, and sentences related to
daily life. They will demonstrate increased confidence in speaking
and listening, engage comfortably with basic reading materials, and
begin forming simple written sentences. The positive, interactive
environment will not only bolster their language development but
also nurture creativity, teamwork, and a lifelong enthusiasm for
learning.
Stable content section
1–2: Greetings and
Introductions
-
Common greetings: “Hello,” “Hi,” “Good morning,”
“Good afternoon,” “Good evening”
-
Farewells: “Goodbye,” “Bye”
-
Introducing oneself: “My name
is… What’s your name?”
-
Simple question-answer patterns: “How are you?” /
“I’m fine, thank you.”
-
Brief conversational
activities (e.g., pair work introducing
classmates)
3–4: Alphabet and Phonics
Basics
-
The English alphabet (A–Z)
-
Distinguishing vowels and
consonants
-
Basic letter-sound correspondence (e.g., “A” –
/æ/ or /eɪ/, “B” – /b/)
-
Sample words for each letter
(“A is for apple,” “B is for book”)
-
Phonics games and flashcard
drills
5–6: Colors and Shapes
-
Primary color words (red, blue, green, yellow,
orange, purple, black, white)
-
Basic shapes (circle, square, triangle,
rectangle)
-
Describing objects by color and shape (“a red
circle,” “a blue square”)
-
Coloring and drawing tasks to reinforce
vocabulary
7–8: Numbers and
Counting
-
Introducing numbers (1–10, or 1–20/30 as
appropriate)
-
Practicing counting objects (“How many pencils
are there?”)
-
Simple number-based activities and games (e.g.,
counting apples, matching numbers with pictures)
-
Writing and pronouncing numerals in
English
9–10: Family and Friends
-
Family members (mother, father, sister, brother,
grandmother, grandfather)
-
The concept of “friend” or “best
friend”
-
Simple sentences: “This is my mother,” “He is my
friend.”
-
Asking/answering questions: “Do you have a
sister?” / “Yes, I do.” / “No, I don’t.”
-
Using pictures or a “family tree” chart for
practice
11–12: Classroom Objects and
Commands
-
Common classroom objects (desk, chair, board,
pencil, book, ruler)
-
Action commands (stand up, sit down, open your
book, close your book)
-
Total Physical Response (TPR) exercises,
responding physically to teacher instructions
-
Matching objects and commands through card or
picture activities
13–14: Days of the Week and Daily
Routines
-
Days of the week (Monday, Tuesday, Wednesday,
Thursday, Friday, Saturday, Sunday)
-
Basic daily actions (wake up, eat breakfast, go
to school, do homework, go to bed)
-
Using the simple present tense to describe
routines (“I wake up at 7 o’clock.”)
-
Making a weekly schedule or
timetable
15–16: Weather and
Seasons
-
Weather words (sunny, rainy, windy, snowy,
cloudy)
-
Four seasons (spring, summer, autumn/fall,
winter)
-
Simple questions: “What’s the weather like?” /
“It’s sunny.”
-
Seasonal descriptions (“In winter, it’s
cold.”)
-
Weather posters or mini role-plays (e.g., weather
forecast)
17–18: Animals and
Nature
-
Animal names (dog, cat, lion, tiger, elephant,
bird)
-
Basic nature words (tree, flower, grass, river,
mountain)
-
Sorting animals (pets vs. wild) and describing
(“A lion is big.”)
-
Nature-related picture descriptions and short
sentences
19–20: Food and Drinks
-
Common foods (apple, banana, bread, pizza, soup,
rice)
-
Drinks (water, juice, milk, tea,
coffee)
-
Expressing preferences: “I like apples,” “I don’t
like carrots.”
-
Polite requests: “Can I have…?” / “Would you
like…?”
-
Role-play scenarios with menus or picture
cards
21–22: Parts of the Body
-
Body parts (head, shoulders, knees, toes, eyes,
ears, mouth, nose)
-
Using songs or TPR (e.g., “Head, Shoulders,
Knees, and Toes”)
-
Simple statements: “I have two
eyes.”
-
Drawing or labeling body parts in
worksheets
23–24: Home and Rooms
-
Rooms in a house (kitchen, bedroom, living room,
bathroom)
-
Describing one’s home: “My bedroom has a
bed.”
-
Location prepositions (in, on,
under)
-
Using pictures or mini house models to
practice
25–26: Clothing and
Shopping
-
Clothing items (shirt, pants, shoes, hat,
coat)
-
Basic shopping dialogue: “How much is it?” /
“It’s five dollars.”
-
Describing what you wear: “I’m wearing a blue
shirt.”
-
Role-playing a simple store scenario (buyer and
seller)
27–28: Simple
Storytelling
-
A short, illustrated story (e.g., “The Very
Hungry Caterpillar”)
-
Key vocabulary from the story, focusing on
characters and sequence (beginning, middle, end)
-
Guided retelling: “What happened
first?”
-
Simple comprehension questions and activities
(picture sequencing)
29–30: Basic Grammar
Consolidation
-
Reviewing core structures (present simple, “I
have…,” basic prepositions, question forms)
-
Practice exercises (fill-in-the-blanks, matching,
short Q&A)
-
Identifying and correcting common
mistakes
-
Group drills or quizzes to reinforce
accuracy
31–32: Fun Review and Group
Projects
-
Revisiting all previous topics through
collaborative activities
-
Creating posters, short skits, or simple
presentations in small groups
-
Interactive games covering vocabulary, grammar,
and phrases
-
Encouraging creativity and teamwork to showcase
learned content
33–34: Assessment and
Culmination
-
Friendly, low-pressure evaluations (oral
questions, short written tasks, picture matching)
-
Summarizing the course and highlighting key
achievements
-
Individual or group feedback
sessions
-
Celebrating progress and discussing next steps in
English learning
Regulatory section
Calendar-thematic plan
From 2 hours to 34 hours
per week
|
№
|
Topic
|
Hours
|
Lesson
objectives
|
Expected
Results
|
|
1-2
|
Greetings and
Introductions
|
2
|
- Teach basic greetings (“Hello,” “Goodbye”)
and introductions (“My name is...”)
Practice short exchanges like “How
are you?” / “I’m fine.”
|
- Students confidently
greet each other and introduce
themselves
Begin feeling comfortable speaking
English in front of peers
|
|
3-4
|
Alphabet and Phonics
Basics
|
2
|
- Familiarize students with letters A to
Z
Introduce basic phonics (simple
vowel and consonant sounds)
|
- Recognize letters and match them to common
sounds
Form basic associations (e.g., “A is
for apple”)
|
|
5-6
|
Colors and
Shapes
|
2
|
- Teach color words (red, blue,
green, etc.) and basic shapes (circle, square, triangle)
<br/>- Practice describing objects by color and
shape
|
- Identify and name colors and
shapes
Use simple sentences (“This is a red
circle”)
|
|
7-8
|
Numbers and
Counting
|
2
|
- Introduce numbers (1–20 or 1–30)
<br/>- Practice counting and using numbers in questions (“How
many…?”)
|
- Count objects
accurately
Use number words in short exchanges
(e.g., “There are 5 apples”)
|
|
9-10
|
Family and
Friends
|
2
|
- Learn family-related vocabulary (mother,
father, sister, brother)
Describe who is in one’s family or
circle of friends
|
- Use simple possessive phrases (“My brother
is...”)
Become more comfortable discussing
personal life in English
|
|
11-12
|
Classroom Objects and
Commands
|
2
|
- Teach names of classroom objects (desk,
chair, pencil, book)
Reinforce TPR (Total Physical
Response) with commands (stand up, sit down)
|
- Correctly respond to classroom
instructions Acquire functional vocabulary for daily school
routines
|
|
13-14
|
Days of the Week and Daily
Routines
|
2
|
- Introduce days
(Monday–Sunday)
Use the simple present tense for
daily activities (“I wake up at 7 AM”)
|
- Name all seven days in
English
Describe basic daily routines (“I go
to school at 8 AM”)
|
|
15-16
|
Weather and
Seasons
|
2
|
- Teach weather vocabulary (sunny, rainy,
cloudy) and seasons (spring, summer, autumn,
winter)
Practice simple weather
expressions
|
- Discuss basic weather
conditions
Improved speaking and listening
regarding everyday contexts
|
|
17-18
|
Animals and
Nature
|
2
|
- Introduce common animal names (dog, cat,
lion, tiger)
Discuss nature terms (tree, flower,
grass)
|
- Broaden vocabulary with animal/nature
words
Form simple descriptive sentences
(“A lion is big”)
|
|
19-20
|
Food and Drinks
|
2
|
- Present basic food items (fruit, vegetables,
snacks) and drinks (water, juice)
Express likes/dislikes (“I like
apples”)
|
- Communicate
preferences
Use polite expressions (“Can I
have…?”)
|
|
21-22
|
Parts of the
Body
|
2
|
- Teach body parts (head, shoulders, knees,
toes)
Reinforce through songs and
TPR
|
- Accurately name body parts in
English
Engage physically with the language
(e.g., action songs)
|
|
23-24
|
Home and Rooms
|
2
|
- Introduce home-related vocabulary (kitchen,
bedroom, living room)
Practice describing one’s home
environment
|
- Describe a house using basic sentences (“My
bedroom has a bed.”)
Practice prepositions (in, on,
under)
|
|
25-26
|
Clothing and
Shopping
|
2
|
- Teach clothing vocabulary (shirt, pants,
shoes)
Practice shopping dialogues (“How
much is it?”)
|
- Name clothing items
Role-play simple shopping
interactions
|
|
27-28
|
Simple
Storytelling
|
2
|
- Introduce a short story using
illustrations
Emphasize key vocabulary and basic
narrative structure
|
- Follow a simple plot and answer
comprehension
Practice oral retelling of short
stories
|
|
29-30
|
Basic Grammar
Consolidation
|
2
|
- Review essential grammar points (pronouns,
simple present tense, prepositions)
Interactive exercises
(fill-in-the-blanks, quizzes)
|
- Demonstrate better sentence
accuracy
Reinforce prior knowledge for
greater retention
|
|
31-32
|
Fun Review and Group
Projects
|
2
|
- Engage students in small group projects
(posters, skits, presentations)
Recap topics from previous lessons
in a creative format
|
- Showcase learned material in a collaborative
setting
Increase confidence and
motivation
|
|
33-34
|
Assessment and
Culmination
|
2
|
- Conduct simple, friendly evaluations (oral
Q&A, matching tasks)
Summarize entire course and
celebrate achievements
|
- Demonstrate overall competence in basic
English skills
Provide constructive feedback for
continued improvement
|
Information and Methodological
Section
Evaluation Criteria
1. Speaking
Skills
Evaluation
Points:
-
Vocabulary
Usage
-
Pronunciation and
Clarity
-
Sentence
Formation
-
Does the student construct basic sentences with
correct word order?
-
Are grammatical structures (e.g., subject-verb
agreement) generally followed?
-
Interaction and
Participation
Sample
Rating:
-
Excellent: Consistently uses new
vocabulary, speaks clearly, forms coherent sentences with minimal
mistakes, and actively engages in
dialogue.
-
Good: Uses adequate vocabulary
with some minor pronunciation or grammar errors, maintains basic
conversations, and is generally willing to
speak.
-
Satisfactory: Has limited but
functional vocabulary, makes noticeable mistakes in pronunciation
or structure, but can still convey meaning with
support.
-
Needs
Improvement: Struggles significantly with
basic words and sentence formation, rarely participates, or needs
constant prompting.
2. Listening
Skills
Evaluation
Points:
-
Comprehension of
Instructions
-
Can the student follow simple classroom commands
(e.g., “Stand up,” “Open your book”)?
-
Do they understand short, spoken prompts and
questions?
-
Story/Audio
Understanding
-
Can the student grasp the main idea of short
stories, rhymes, or dialogues?
-
Are they able to answer basic comprehension
questions?
-
Response to Audio
Stimuli
Sample
Rating:
-
Excellent: Responds accurately to oral
instructions and questions, demonstrates strong understanding of
short passages or dialogues.
-
Good: Generally follows
instructions and understands main ideas, may require repetition for
detail.
-
Satisfactory: Understands basic
commands and parts of a simple story or dialogue, needs support or
rephrasing to fully grasp content.
-
Needs
Improvement: Frequently confused by
spoken tasks or instructions, requires multiple repetitions or
clarifications.
3. Reading
Skills
Evaluation
Points:
-
Decoding and Word
Recognition
-
Basic
Fluency
-
Do they read short sentences with appropriate
speed and accuracy?
-
Is the reading mostly smooth, or do they hesitate
often?
-
Comprehension
-
Can they understand the gist of a short, simple
passage?
-
Do they correctly answer basic questions about
what they have read?
Sample
Rating:
-
Excellent: Reads short texts fluently
with minimal errors, demonstrates clear understanding of the
content.
-
Good: Recognizes most common words
easily, can read short passages with some pauses, understands main
ideas.
-
Satisfactory: Relies on sounding out
many words, may miss some meaning, but completes basic reading
tasks.
-
Needs
Improvement: Struggles significantly with
word recognition and decoding, shows limited comprehension without
guidance.
4. Writing
Skills
Evaluation
Points:
-
Spelling and
Vocabulary
-
Sentence
Construction
-
Are basic sentences structured properly (subject
+ verb + object)?
-
Do they apply grammar rules learned in class
(e.g., plural “-s,” simple present tense)?
-
Clarity and
Neatness
-
Writing
Tasks
-
Can they complete simple exercises (filling gaps,
matching words) accurately?
-
Do they attempt short compositions (1–2
sentences) on familiar topics?
Sample
Rating:
-
Excellent: Writes short sentences
clearly and accurately, demonstrates correct spelling and grammar
usage, attempts more than required.
-
Good: Generally accurate spelling
of common words, occasional grammar slips, can form coherent
sentences.
-
Satisfactory: Makes noticeable
errors in spelling or grammar, but the main idea is usually
understandable.
-
Needs
Improvement: Struggles to form complete
sentences, frequent spelling or grammar mistakes hinder
comprehension.
5.
Engagement and
Behavior
Evaluation Points:
-
Participation
-
Does the student show enthusiasm in class
activities, games, and group work?
-
Are they actively involved in discussions,
volunteering answers or questions?
-
Cooperation and
Teamwork
-
Effort and
Attitude
-
Consistency
-
Is the student’s effort steady throughout the
course?
-
Do they maintain positive learning habits
(bringing materials, staying focused)?
Sample
Rating:
-
Excellent: Consistently engaged,
cooperative, and motivated, contributing positively to class
dynamics.
-
Good: Participates well in most
activities, works cooperatively, shows reasonable
effort.
-
Satisfactory: Occasionally needs
encouragement to join activities, works better with close
guidance.
-
Needs
Improvement: Often distracted or
disengaged, rarely contributes to discussions, resists team
tasks.
Using the
Criteria
-
Combine or adapt these categories to align with
your grading system (e.g., letter grades, numerical scores,
descriptive feedback).
-
Offer formative (ongoing) assessments
throughout lessons (observations, short quizzes, TPR checks)
and summative (end-of-term) assessments to
gauge progress.
-
Provide positive, constructive
feedback so primary learners remain
motivated and see language learning as an enjoyable,
confidence-building process.
Educational and methodological
complex
Lesson plans
Short-term plan 1-2
|
Teacher name:
|
|
|
Date:
|
|
|
Grade:
|
|
Number present:
|
absent:
|
|
Theme of the lesson
|
Greetings and
Introductions
|
|
Lesson objectives
|
- Teach basic greetings (“Hello,” “Goodbye”)
and introductions (“My name is...”)
Practice short exchanges like “How
are you?” / “I’m fine.”
|
|
Lessonperiod / time
|
Teacher's action
|
Studentaction
|
Evaluation
|
Resources
|
|
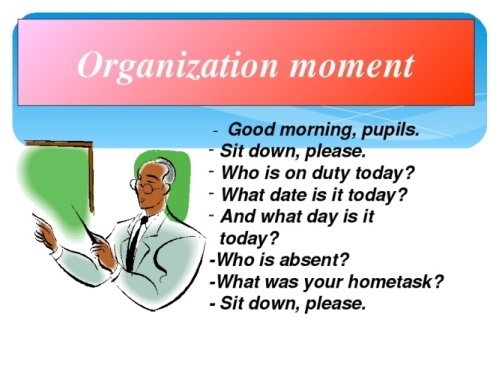
The beginning of the
lesson
10 min
|
Greeting learners.
Greetings. Greeting learners. Setting
positive atmosphere by asking some ice breaking
questions. T. listens duties
report
|
-
the mood will rise
-
will be ready for the lesson. answer
questions
-
|
The method of "verbal
encouragement"
|
|
|
The middle of the lesson
30 min
|
Lesson 1: Greetings and Basic
Introductions
I. Organizational Stage (5
minutes)
-
Greeting the
Students: "Hello everyone! Welcome to
our English class."
-
Checking
Attendance: Briefly take
attendance.
-
Lesson Topic
Introduction: "Today, we are going to learn
how to greet people and introduce ourselves in
English."
-
Lesson
Objectives: "By the end of this lesson,
you will be able to say common English greetings and farewells,
introduce yourself, and ask for someone's
name."
II. Introducing New Material (20
minutes)
-
Common
Greetings:
-
Teacher says and writes on the board: "Hello,"
"Hi," "Good morning," "Good afternoon," "Good
evening."
-
Students repeat in chorus and
individually.
-
Teacher explains the time of
day for "Good morning," "Good afternoon," and "Good
evening." (Relate to their school day if
applicable).
-
Question for
students: "What time of day is it now?
So, which greeting should we use?"
-
Possible Answer:
"Good evening."
-
Farewells:
-
Teacher says and writes on the board: "Goodbye,"
"Bye."
-
Students repeat in chorus and
individually.
-
Teacher explains the difference in formality (if
appropriate for the level).
-
Introducing
Oneself:
-
Teacher says and writes on the
board: "My name is [Teacher's Name].
What’s your name?"
-
Teacher points to themselves while saying "My
name is…" and gestures towards a student while saying "What’s your
name?"
-
Students practice asking and answering in chorus
and individually.
-
Teacher can write sentence frames on the
board:
-
"My name is _______."
-
"What’s your name?"
-
"My name is _______."
-
Simple
Question-Answer Patterns:
-
Teacher says and writes on the board: "How are
you?" / "I’m fine, thank you."
-
Students repeat in chorus and
individually.
-
Teacher explains the meaning and appropriate
response.
-
Teacher can introduce variations like "I'm good,
thank you," or "Very well, thank you" (depending on the
level).
-
Question for
students: "How are you
today?"
-
Possible
Answer: "I’m fine, thank
you."
III. Practice
Activities (15 minutes)
-
Greeting
Practice:
-
Teacher greets individual students with different
greetings, and students respond appropriately.
-
Students practice greeting each other in pairs.
Teacher can prompt them: "Say 'Hello' to your
partner."
-
Introducing
Yourself in Pairs:
-
Teacher instructs students to work in
pairs.
-
Teacher models the activity
with a student: "Hello. My name is [Teacher's Name]. What’s your
name?" Student replies: "My name is [Student's
Name]." Teacher: "Nice to meet you, [Student's
Name]."
-
Students practice introducing themselves to their
partners using the pattern.
-
Teacher walks around the classroom, providing
support and correction as needed.
-
"How Are You?"
Practice:
IV. Preparation for the Next Stage (5
minutes)
-
Review: Briefly review the greetings,
farewells, and introduction patterns learned in the
lesson.
-
Preview of Next
Lesson: "In our next lesson, we will
practice introducing our classmates to each other and learn more
ways to start simple
conversations."
-
Homework
(Optional): "Practice saying 'Hello,'
'Goodbye,' and 'My name is…' at
home."
V. Conclusion (5
minutes)
-
Farewell
Practice: Teacher says "Goodbye" or
"Bye" to the class, and students
respond.
-
Positive
Reinforcement: "Well done, everyone! You did
a great job learning how to greet and introduce yourselves in
English today."
Lesson 2: Greetings, Introductions, and Brief
Conversations
I. Organizational
Stage (5 minutes)
-
Greeting and
Review: "Hello again, everyone! How
are you today?" Students respond.
Briefly review greetings and farewells from the
previous lesson.
-
Checking
Attendance: Briefly take
attendance.
-
Lesson Topic
Introduction: "Today, we will continue
practicing our greetings and introductions, and we will learn how
to introduce our classmates to each
other."
-
Lesson
Objectives: "By the end of this lesson,
you will be able to use greetings and farewells confidently,
introduce yourself and others, and have a very short
conversation."
II. Review and Expanding Knowledge (15
minutes)
-
Review of Basic
Introductions:
-
Introducing
Others:
-
Teacher says and writes on the
board: "This is [Name]." (pointing to a student). "His/Her name is
[Name]." (Teacher explains when to use "his" and
"her").
-
Teacher models introducing one
student to another: "Aruzhan, this is
Sanzhar. Sanzhar, this is
Aruzhan."
-
Students repeat the phrases in chorus and
individually.
-
Teacher can write sentence frames on the
board:
-
More Responses to "How Are
You?":
-
Teacher introduces: "I’m good," "I’m very well,"
"Not bad," "So-so."
-
Students repeat and teacher explains the
meanings.
-
Teacher asks individual students "How are you?"
and encourages them to use different responses.
III. Conversational
Activities (20 minutes)
-
Pair Work:
Introducing Classmates:
-
Teacher instructs students to walk around the
classroom and introduce themselves to a new
partner.
-
Then, they should introduce their first partner
to their second partner.
-
Teacher can provide a simple structure on the
board:
-
Student 1 to Student 2:
"Hello. My name is [Name 1].
What’s your name?"
-
Student 2: "My name is [Name
2]."
-
Student 1 introduces Student 2 to Student 3:
"[Name 3], this is [Name 2]."
-
Student 3: "Hi, [Name 2]. Nice to meet
you."
-
Student 2: "Nice to meet you too, [Name
3]."
-
Teacher monitors and assists as
needed.
-
Brief
Role-Playing:
-
Teacher creates simple scenarios, such as meeting
someone for the first time at school or in the
park.
-
Students work in pairs or small groups to act out
these scenarios, using the greetings, introductions, and "How are
you?" questions and answers they have learned.
-
Example
Scenario: "You see a new student in the
hallway. Introduce yourself."
IV. Preparation for the Next Stage (5
minutes)
-
Review: Briefly review how to
introduce oneself and others.
-
Preview of Future
Lessons: "In our upcoming lessons, we
will learn more phrases for starting and continuing simple
conversations."
-
Homework
(Optional): "Practice introducing your
family members to each other in
English."
V. Conclusion (5
minutes)
-
Farewell
Activity: Teacher asks students to say
"Goodbye" to their classmates.
-
Positive
Feedback: "Excellent work today,
everyone! You are all doing a great job with your
English."
|
Performs
exercises
Performs exercises
Performs text-related tasks
Performs text-related tasks
Performs text-related tasks
Performs text-related tasks
Performs exercises
Performs text-related tasks
Performs exercises
Performs text-related tasks
Performs text-related
tasks
|
Using the thumb method
The "wonderful,
good, wonderful" method
Through a
traffic light
The "wonderful,
good, wonderful" method
Through a
traffic light
The "wonderful,
good, wonderful" method
Through a
traffic light
The "wonderful,
good, wonderful" method
Through a
traffic light
|
|
|
End of lesson
5 min
|
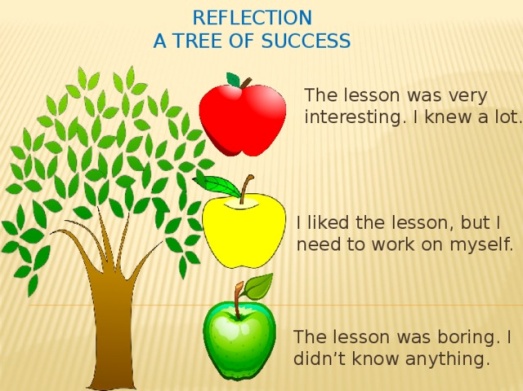
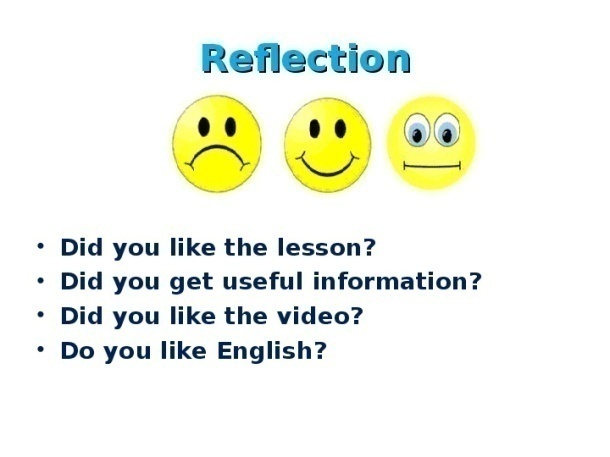
Reflection
|
Creates feedback
|
|
|
Short-term plan-3-4
|
Teacher name:
|
|
|
Date:
|
|
|
Grade:
|
|
Number present:
|
absent:
|
|
Theme of the lesson
|
Alphabet and Phonics
Basics
|
|
Lesson objectives
|
- Familiarize students with letters A to
Z
Introduce basic phonics (simple
vowel and consonant sounds)
|
Lessonaction
|
Lessonperiod / time
|
Teacher's action
|
Studentaction
|
Evaluation
|
Resources
|
|
The beginning of the
lesson
10 min
|
Greeting learners.

|
-
the mood will rise
-
will be ready for the lesson. answer
questions
-
|
The method of "verbal
encouragement"
|
|
|
The middle of the lesson
30min
|
Lesson 3: Introduction to the English Alphabet
and Basic Sounds
I. Organizational
Stage (5 minutes)
-
Greeting and
Review: "Hello everyone! How are you
today?" (Briefly review greetings from previous
lessons).
-
Checking
Attendance: Briefly take
attendance.
-
Lesson Topic
Introduction: "Today, we are starting to
learn the English alphabet and the sounds that letters
make."
-
Lesson
Objectives: "By the end of this lesson,
you will be able to recognize and say all the letters of the
English alphabet and understand the difference between vowels and
consonants. You will also learn the basic sounds of some
letters."
II. Introducing New Material (20
minutes)
-
The English Alphabet
(A–M):
-
Teacher says and writes the letters A to M on the
board, clearly pronouncing each letter.
-
Students repeat in chorus and
individually.
-
Teacher can use a visual alphabet
chart.
-
Teacher points to each letter randomly and asks
students to say the letter.
-
Activity: Students write the letters A
to M in their notebooks.
-
Distinguishing Vowels and Consonants
(Introduction):
-
Teacher says and writes the vowels: A, E, I, O,
U.
-
Teacher explains that these letters have special
sounds and often help us make different sounds in
words.
-
Teacher says and writes some consonants (e.g., B,
C, D, F, G, H, J, K, L, M, N, P, Q, R, S, T, V, W, X, Y,
Z).
-
Teacher explains that these letters usually make
sounds that are blocked by our tongue or lips.
-
Activity: Teacher points to letters on
the alphabet chart, and students say if it's a vowel or a
consonant.
-
Basic Letter-Sound Correspondence (Initial
Sounds):
-
Teacher focuses on the sounds of a few initial
letters:
-
A: /æ/ (as in apple) - Teacher
says "apple" clearly, emphasizing the /æ/
sound.
-
B: /b/ (as in book) - Teacher
says "book" clearly, emphasizing the /b/
sound.
-
C: /k/ (as in cat) - Teacher says
"cat" clearly, emphasizing the /k/
sound.
-
D: /d/ (as in dog) - Teacher says
"dog" clearly, emphasizing the /d/
sound.
-
E: /e/ (as in egg) - Teacher says
"egg" clearly, emphasizing the /e/
sound.
-
Teacher uses flashcards with the letter and a
picture of the word (e.g., a picture of an apple next to the letter
A).
-
Students repeat the letter and the sound in
chorus and individually.
-
Sample
Words:
III. Phonics Games and Flashcard Drills (15
minutes)
-
Flashcard
Drill:
-
Teacher shows flashcards with letters (A-M).
Students say the letter and the basic sound (if
learned).
-
Teacher can also show flashcards with the sample
words and ask students to identify the first letter and its
sound.
-
"Letter Sound
Bingo":
-
"A is for..."
Game:
IV. Preparation for the Next Stage (5
minutes)
-
Review: Briefly review the letters A
to M, the vowels, consonants, and the basic sounds learned (A, B,
C, D, E).
-
Preview of Next
Lesson: "In our next lesson, we will
learn the rest of the English alphabet (N to Z) and more letter
sounds."
-
Homework
(Optional): "Try to find objects at home
that start with the letters A, B, C, D, and E. Say the letter and
the word."
V. Conclusion (5
minutes)
-
Alphabet Song
(A-M): Teacher and students sing the
first part of the English alphabet
song.
-
Positive
Reinforcement: "Great job today, everyone!
You are doing a fantastic job learning the English alphabet and
sounds."
Lesson 4: Completing the Alphabet and Expanding
Phonics
I. Organizational
Stage (5 minutes)
-
Greeting and
Review: "Hello everyone! How are you
today?" (Briefly review greetings and the alphabet A-M from the
previous lesson).
-
Checking
Attendance: Briefly take
attendance.
-
Lesson Topic
Introduction: "Today, we will finish
learning the English alphabet and learn more about the sounds that
letters make."
-
Lesson
Objectives: "By the end of this lesson,
you will be able to recognize and say all the letters of the
English alphabet and understand the basic sounds of more
letters."
II. Introducing New Material (20
minutes)
-
The English Alphabet
(N–Z):
-
Teacher says and writes the letters N to Z on the
board, clearly pronouncing each letter.
-
Students repeat in chorus and
individually.
-
Teacher uses the visual alphabet chart
again.
-
Teacher points to each letter randomly (including
A-M from the previous lesson) and asks students to say the
letter.
-
Activity: Students write the letters N
to Z in their notebooks.
-
Review of Vowels and
Consonants:
-
Briefly review the concept of vowels (A, E, I, O,
U) and consonants.
-
Activity: Teacher says a letter, and
students say if it's a vowel or a
consonant.
-
Basic Letter-Sound Correspondence (More
Sounds):
-
Teacher focuses on the sounds of more
letters:
-
F: /f/ (as in
fish)
-
G: /ɡ/ (as in
goat)
-
H: /h/ (as in hat)
-
I: /ɪ/ (as in
igloo)
-
J: /dʒ/ (as in
juice)
-
K: /k/ (as in
kite)
-
L: /l/ (as in
lion)
-
M: /m/ (as in
monkey)
-
N: /n/ (as in
nose)
-
Teacher uses flashcards with the letter and a
picture of the word.
-
Students repeat the letter and
the sound in chorus and
individually.
-
Sample
Words:
III. Phonics Games and Flashcard Drills (15
minutes)
-
Flashcard Drill
(Full Alphabet):
-
"Match the Letter to the
Sound":
-
"Word Sound
Out":
-
"I Spy with My Little
Eye":
-
Teacher says, "I spy with my
little eye something that begins with the letter B and makes the
/b/ sound." Students guess the object (e.g., book,
bag).
IV. Preparation for the Next Stage (5
minutes)
-
Review: Briefly review the letters N
to Z and the basic sounds learned in this
lesson. Review all vowels and
consonants.
-
Preview of Future
Lessons: "In our next lessons, we will
learn more about different sounds that letters can make and start
reading simple words."
-
Homework
(Optional): "Try to find objects at home
that start with the letters F to N. Say the letter and the
word."
V. Conclusion (5
minutes)
-
Alphabet Song (N-Z and
Full): Teacher and students sing the
second part and then the full English alphabet
song.
-
Positive
Reinforcement: "Excellent work today,
everyone! You have now learned all the letters of the English
alphabet and many of their sounds!"
|
Performs
exercises
Performs exercises
Performs text-related tasks
Performs text-related tasks
Performs text-related tasks
Performs text-related tasks
Performs exercises
Performs text-related tasks
Performs exercises
|
Using the thumb method
The "wonderful,
good, wonderful" method
Through a
traffic light
The "wonderful,
good, wonderful" method
Through a
traffic light
The "wonderful,
good, wonderful" method
Through a
traffic light
The "wonderful,
good, wonderful" method
Through a
traffic light
|
|
|
End of lesson
5 min
|

|
Creates feedback
|
|
|
Short-term plan-5-6
|
Teacher name:
|
|
|
Date:
|
|
|
Grade:
|
|
Number present:
|
absent:
|
|
Theme of the lesson
|
Colors and
Shapes
|
|
Lesson objectives
|
- Teach color words (red, blue,
green, etc.) and basic shapes (circle, square, triangle)
<br/>- Practice describing objects by color and
shape
|
Lessonaction
|
Lessonperiod / time
|
Teacher's action
|
Studentaction
|
Evaluation
|
Resources
|
|
The beginning of the
lesson
10 min
|
Greeting learners.
|
-
the mood will rise
-
will be ready for the lesson. answer
questions
-
|
The method of "verbal
encouragement"
|
|
|
The middle of the lesson
30min
|
Lesson 5: Introduction to
Colors
I. Organizational Stage (5
minutes)
-
Greeting and
Review: "Hello everyone! How are you
today?" (Briefly review alphabet and basic sounds if
appropriate).
-
Checking
Attendance: Briefly take
attendance.
-
Lesson Topic
Introduction: "Today, we are going to learn
the names of different colors in
English."
-
Lesson
Objectives: "By the end of this lesson,
you will be able to recognize and say the names of the primary
colors: red, blue, green, yellow, orange, purple, black, and
white."
II. Introducing New Material (20
minutes)
-
Primary Color Words (Visual
Introduction):
-
Teacher holds up objects or flashcards of each
color, clearly saying the color name:
-
Red
(e.g., an apple, a red card)
-
Blue (e.g., a blue pen, a blue
card)
-
Green (e.g., a leaf, a green
card)
-
Yellow (e.g., a lemon, a yellow
card)
-
Orange (e.g., an orange, an orange
card)
-
Purple (e.g., grapes, a purple
card)
-
Black (e.g., a black marker, a black
card)
-
White (e.g., a piece of paper, a white
card)
-
Students repeat each color name in chorus and
individually.
-
Color Recognition
Activities:
-
Teacher points to different
colored objects in the classroom and asks, "What color is
this?" Students respond with the color
name.
-
Teacher shows colored flashcards and asks
students to name the color.
-
"Touch the Color"
Game:
-
Sing a Color
Song:
III. Coloring Task
(15 minutes)
-
Distribute Coloring
Sheets: Teacher gives each student a
coloring sheet with simple shapes or pictures
outlined.
-
Instructions:
Teacher instructs students to
color specific parts of the sheet with the colors they have
learned. For example, "Color the apple red," "Color the sky blue,"
"Color the grass green," etc.
-
Reinforce
Vocabulary: While students are coloring,
the teacher can walk around and ask, "What color are you using?" or
"What color is this?" pointing to their coloring
sheet.
IV. Preparation for the Next Stage (5
minutes)
-
Review: Briefly review all the color
words learned in the lesson.
-
Preview of Next
Lesson: "In our next lesson, we will
learn the names of basic shapes and practice using color and shape
words together."
-
Homework
(Optional): "Find one object of each color
(red, blue, green, yellow, orange, purple, black, white) at home
and be ready to say the color name in our next
class."
V. Conclusion (5
minutes)
-
Color Identification
Game: Teacher holds up different
colored objects or cards and asks the class to shout out the
color.
-
Positive
Reinforcement: "Excellent job learning your
colors today, everyone! You all did a wonderful
job."
Lesson 6: Introduction to Shapes and Describing
Objects
I. Organizational
Stage (5 minutes)
-
Greeting and
Review: "Hello everyone! How are you
today?" (Briefly review colors from the previous lesson by asking
students to name different colors).
-
Checking
Attendance: Briefly take
attendance.
-
Lesson Topic
Introduction: "Today, we are going to learn
the names of basic shapes and how to describe objects using their
color and shape."
-
Lesson
Objectives: "By the end of this lesson,
you will be able to recognize and say the names of the basic
shapes: circle, square, triangle, and rectangle. You will also be
able to describe simple objects using their color and
shape."
II. Introducing New Material (20
minutes)
-
Basic Shapes
(Visual Introduction):
-
Teacher holds up objects or flashcards of each
shape, clearly saying the shape name:
-
Circle (e.g., a ball, a circular
card)
-
Square (e.g., a block, a square
card)
-
Triangle (e.g., a triangular ruler, a triangular
card)
-
Rectangle (e.g., a book, a rectangular
card)
-
Students repeat each shape name in chorus and
individually.
-
Shape Recognition
Activities:
-
Teacher points to different
shaped objects in the classroom and asks, "What shape is
this?" Students respond with the shape
name.
-
Teacher shows shape flashcards and asks students
to name the shape.
-
"Draw the Shape"
Activity:
-
Describing Objects by Color and
Shape:
-
Teacher holds up a colored shape (e.g., a red
circle) and says, "a red circle."
-
Teacher repeats with other color-shape
combinations (e.g., a blue square, a green triangle, a yellow
rectangle).
-
Students repeat the phrases after the
teacher.
-
Teacher can write sentence frames on the board:
"a _______ _______" (color) (shape)
III. Drawing and Describing Task (15
minutes)
-
Instructions:
Teacher asks students to draw
different colored shapes in their notebooks or on a piece of
paper. For example:
-
Draw a red circle.
-
Draw a blue square.
-
Draw a green triangle.
-
Draw a yellow rectangle.
-
Reinforce
Vocabulary: After drawing, teacher asks
individual students to describe their drawings using the phrase "a
[color] [shape]". For example, "What is this?" (pointing to a
drawing). Student responds, "a red
circle."
IV. Preparation for the Next Stage (5
minutes)
-
Review: Briefly review all the shape
words learned in the lesson and how to describe an object using its
color and shape.
-
Preview of Future
Lessons: "In our next lessons, we will
learn more about different sizes and practice describing more
objects around us."
-
Homework
(Optional): "Find one object of each shape
(circle, square, triangle, rectangle) at home and be ready to say
the shape name in our next class.
Also, try to describe their
color."
V. Conclusion (5
minutes)
-
Shape Identification
Game: Teacher says a shape, and
students point to an object in the classroom that has that
shape.
-
Positive
Reinforcement: "Wonderful job learning about
shapes and how to describe objects
today! You are all doing so
well."
|
Performs
exercises
Performs exercises
Performs text-related tasks
Performs text-related tasks
Performs text-related tasks
Performs text-related tasks
Performs exercises
Performs text-related tasks
|
Using the thumb method
The "wonderful,
good, wonderful" method
Through a
traffic light
The "wonderful,
good, wonderful" method
Through a
traffic light
The "wonderful,
good, wonderful" method
Through a
traffic light
The "wonderful,
good, wonderful" method
Through a
traffic light
|
|
|
End of lesson
5
min Reflection
|
|
Creates feedback
|
|
|
Short-term plan-7-8
|
Teacher name:
|
|
|
Date:
|
|
|
Grade:
|
|
Number present:
|
absent:
|
|
Theme of the lesson
|
Numbers and
Counting
|
|
Lesson objectives
|
- Introduce numbers (1–20 or 1–30)
<br/>- Practice counting and using numbers in questions (“How
many…?”)
|
Lessonaction
|
Lessonperiod / time
|
Teacher's action
|
Studentaction
|
Evaluation
|
Resources
|
|
The beginning of the
lesson
10 min
|
Greeting learners.

|
-
the mood will rise
-
will be ready for the lesson. answer
questions
-
|
The method of "verbal
encouragement"
|
|
|
|
Lesson 7: Introducing Numbers
1-10
I. Organizational Stage (5
minutes)
-
Greeting and
Review: "Hello everyone! How are you
today?" (Briefly review colors and shapes if
appropriate).
-
Checking
Attendance: Briefly take
attendance.
-
Lesson Topic
Introduction: "Today, we are going to start
learning how to count in English!"
-
Lesson
Objectives: "By the end of this lesson,
you will be able to recognize, say, and write the English numerals
for numbers one through ten."
II. Introducing New Material (20
minutes)
-
Introducing Numbers 1-5 (Pronunciation and
Visuals):
-
Teacher holds up fingers, objects (e.g., pencils,
blocks), or flashcards showing each number from 1 to
5.
-
Teacher clearly says the number name and writes
the numeral on the board:
-
1 - one
-
2 - two
-
3 - three
-
4 - four
-
5 - five
-
Students repeat each number name in chorus and
individually.
-
Practicing Counting
Objects (1-5):
-
Teacher holds up a small group
of objects (e.g., 3 pencils) and asks, "How many pencils are
there?" Students count and say
"Three."
-
Teacher repeats with different numbers of objects
(1 to 5).
-
Teacher can ask individual students to count
objects in the classroom (e.g., "How many windows are
there?").
-
Introducing Numbers 6-10 (Pronunciation and
Visuals):
-
Teacher continues with numbers 6 to 10, using the
same method as above:
-
6 - six
-
7 - seven
-
8 - eight
-
9 - nine
-
10 - ten
-
Students repeat each number name in chorus and
individually.
-
Practicing Counting
Objects (1-10):
III. Simple Number-Based Activities and Games (15
minutes)
-
"Count with Me"
Game:
-
"Show Me"
Activity:
-
Counting Apples (or other familiar
objects):
-
Teacher draws simple pictures of apples (or other
objects) on the board in groups of 1 to 10.
-
Teacher points to a group and
asks, "How many apples are there?"
Students count and
answer.
-
Matching Numbers
with Pictures:
-
Teacher can use pre-made worksheets or quickly
draw pictures of groups of objects (1-10) on one side of the board
and write the numerals (1-10) in a random order on the other
side.
-
Students draw lines to match the number with the
correct picture.
IV. Writing Numerals in English (5
minutes)
-
Writing Practice
(1-5):
-
Teacher shows how to write the numerals 1, 2, 3,
4, and 5 on the board, emphasizing the correct
formation.
-
Students practice writing these numerals in their
notebooks.
-
Writing Practice
(6-10):
-
Teacher shows how to write the numerals 6, 7, 8,
9, and 10 on the board.
-
Students practice writing these numerals in their
notebooks.
V. Conclusion (5
minutes)
-
Number
Rhyme/Song: Teacher and students sing a
simple number rhyme or song that counts from one to
ten.
-
Positive
Reinforcement: "Fantastic job learning your
numbers today! You can all count to ten in English
now!"
-
Homework
(Optional): "Practice counting objects at
home up to ten and try to write the
numbers."
Lesson 8: Numbers 11-20 and Further
Counting
I. Organizational Stage (5
minutes)
-
Greeting and
Review: "Hello everyone! How are you
today?" (Briefly review numbers 1-10 by counting as a
class).
-
Checking
Attendance: Briefly take
attendance.
-
Lesson Topic
Introduction: "Today, we are going to learn
even more numbers in English, up to
twenty!"
-
Lesson
Objectives: "By the end of this lesson,
you will be able to recognize, say, and write the English numerals
for numbers eleven through twenty, and practice counting objects up
to twenty."
II. Introducing New Material (20
minutes)
-
Review Numbers 1-10: Quickly count from one to ten as a
class.
-
Introducing Numbers 11-15 (Pronunciation and
Visuals):
-
Teacher uses objects or flashcards to introduce
numbers 11 to 15.
-
Teacher clearly says the number name and writes
the numeral on the board:
-
11 - eleven
-
12 - twelve
-
13 - thirteen
-
14 - fourteen
-
15 - fifteen
-
Students repeat each number name in chorus and
individually.
-
Introducing Numbers 16-20 (Pronunciation and
Visuals):
-
Practicing Counting
Objects (11-20):
-
Teacher holds up groups of
objects (11 to 20) and asks, "How many [objects] are
there?" Students count and say the
number.
-
Teacher can ask students to count larger objects
in the classroom (e.g., "How many desks are
there?").
III. Simple Number-Based Activities and Games (15
minutes)
-
"Count Around the
Circle":
-
Students sit in a circle. Teacher starts by
saying "One," the next student says "Two," and so on, up to
twenty.
-
"Number Flashcard
Game":
-
"Counting Game with
Clapping":
-
Matching Numbers with Pictures (Up to
20):
IV. Writing Numerals in English (5
minutes)
-
Writing Practice
(11-15):
-
Teacher shows how to write the numerals 11, 12,
13, 14, and 15 on the board.
-
Students practice writing these numerals in their
notebooks.
-
Writing Practice
(16-20):
-
Teacher shows how to write the numerals 16, 17,
18, 19, and 20 on the board.
-
Students practice writing these numerals in their
notebooks.
V. Conclusion (5
minutes)
-
Counting Song
(1-20): Teacher and students sing a
number song that goes up to twenty.
-
Positive
Reinforcement: "Wonderful! Now you can count
all the way to twenty in English!
That's fantastic!"
-
Homework
(Optional): "Practice counting objects at
home up to twenty and try to write the numbers. You can also ask
your family members to count with
you!"
|
Performs
exercises
Performs exercises
Performs text-related tasks
Performs text-related tasks
Performs text-related tasks
Performs text-related tasks
Performs exercises
Performs text-related tasks
Performs exercises
Performs text-related tasks
Performs text-related
tasks
|
Using the thumb method
The "wonderful,
good, wonderful" method
Through a
traffic light
The "wonderful,
good, wonderful" method
Through a
traffic light
The "wonderful,
good, wonderful" method
Through a
traffic light
The "wonderful,
good, wonderful" method
Through a
traffic light
|
|
|
End of lesson
5
min Reflection
|
|
Creates feedback
|
|
|
Short-term plan-9-10
|
Teacher name:
|
|
|
Date:
|
|
|
Grade:
|
|
Number present:
|
absent:
|
|
Theme of the lesson
|
Family and
Friends
|
|
Lesson objectives
|
- Learn family-related vocabulary (mother,
father, sister, brother)
Describe who is in one’s family or
circle of friends
|
Lessonaction
|
Lessonperiod / time
|
Teacher's action
|
Studentaction
|
Evaluation
|
Resources
|
|
The beginning of the
lesson
10 min
|
Greeting learners.
|
-
the mood will rise
-
will be ready for the lesson. answer
questions
-
|
The method of "verbal
encouragement"
|
|
|
|
Lesson 9: Family Members
I. Organizational Stage (5
minutes)
-
Greeting and
Review: "Hello everyone! How are you
today?" (Briefly review numbers 1-20 if
appropriate).
-
Checking
Attendance: Briefly take
attendance.
-
Lesson Topic
Introduction: "Today, we are going to learn
the names of our family members in
English."
-
Lesson
Objectives: "By the end of this lesson,
you will be able to recognize and say the English words for mother,
father, sister, brother, grandmother, and
grandfather."
II. Introducing New Material (20
minutes)
-
Introducing Mother
and Father:
-
Teacher shows a picture of a
mother and says, "This is my mother."
Writes "mother" on the board. Students
repeat.
-
Teacher shows a picture of a
father and says, "This is my father."
Writes "father" on the board. Students
repeat.
-
Teacher can ask simple questions like, "Where is
your mother?" (without expecting a full sentence answer initially,
just the word "mother").
-
Introducing Sister
and Brother:
-
Teacher shows a picture of a
sister (or draws a simple one) and says, "This is my
sister." Writes "sister" on the board. Students
repeat.
-
Teacher shows a picture of a
brother (or draws a simple one) and says, "This is my
brother." Writes "brother" on the board. Students
repeat.
-
Teacher asks, "Do you have a
sister?" (Yes/No responses are sufficient at this
stage). "Do you have a brother?"
-
Introducing
Grandmother and Grandfather:
-
Teacher shows a picture of a
grandmother and says, "This is my
grandmother." Writes "grandmother" on the board. Students
repeat.
-
Teacher shows a picture of a
grandfather and says, "This is my
grandfather." Writes "grandfather" on the board. Students
repeat.
-
Teacher can explain that "grandmother" can also
be "grandma" and "grandfather" can also be "grandpa" (optional,
depending on the level).
-
Using Pictures for
Practice:
-
Teacher shows various pictures of families (can
be simple drawings or real photos).
-
Teacher points to a person in the picture and
asks, "Who is this?" Students try to name the family member in
English. Teacher provides support and the correct word if
needed.
III. Activities (15
minutes)
-
"Show Me Your Family" (Optional):
If students are
comfortable, they can show a picture of their own family and point
to different members, saying the English
names.
-
"Family Member Matching":
Teacher can prepare simple
worksheets with pictures of family members on one side and the
English words on the other. Students draw lines to match the
pictures with the words.
-
"Who is Missing?" Game: Teacher puts up flashcards of the
family members. Students close their eyes. Teacher removes one
flashcard. Students open their eyes and guess who is missing by
saying the English word.
-
Drawing a Family Member:
Teacher asks students to
draw one of their family members and then say the English name of
the person they drew.
IV. Preparation for the Next Stage (5
minutes)
-
Review: Briefly review all the family
member words learned in the lesson.
-
Preview of Next
Lesson: "In our next lesson, we will
talk more about our family and also learn about our
friends."
-
Homework
(Optional): "Try to find pictures of your
family members and practice saying their names in
English."
V. Conclusion (5
minutes)
-
"Family Member
Charades": Teacher (or students, if
comfortable) can act out a family member (e.g., pretending to read
a newspaper like a grandfather) and students guess who it is in
English.
-
Positive
Reinforcement: "Excellent work learning about
your family in English today!
You
all did a great job."
Lesson 10: Talking About Family and
Friends
I. Organizational
Stage (5 minutes)
-
Greeting and
Review: "Hello everyone! How are you
today?" (Briefly review family member vocabulary from the previous
lesson).
-
Checking
Attendance: Briefly take
attendance.
-
Lesson Topic
Introduction: "Today, we are going to talk
more about our family and also learn about our friends in
English."
-
Lesson
Objectives: "By the end of this lesson,
you will be able to use simple sentences to talk about your family
and friends, and ask and answer basic questions about family
members."
II. Introducing New Material (20
minutes)
-
Review of Family Members:
Quickly review the
vocabulary for mother, father, sister, brother, grandmother, and
grandfather using flashcards or
pictures.
-
Introducing "Friend" and "Best
Friend":
-
Teacher says, "This is my
friend." (pointing to a student or showing a
picture). Writes "friend" on the board. Students
repeat.
-
Teacher explains the concept of a friend –
someone you like to play with and spend time
with.
-
Teacher introduces "best
friend" and explains it's a very close
friend. Writes "best friend" on the board. Students
repeat.
-
Teacher asks, "Do you have a
friend?" "Do you have a best friend?"
(Yes/No responses are
sufficient).
-
Simple
Sentences:
-
Teacher writes and says: "This is my mother."
(pointing to a picture or drawing).
-
Teacher writes and says: "This is my
father."
-
Teacher writes and says: "This is my
sister."
-
Teacher writes and says: "This is my
brother."
-
Teacher writes and says: "This is my
grandmother."
-
Teacher writes and says: "This is my
grandfather."
-
Teacher writes and says: "He is my friend."
(pointing to a boy in a picture or student).
-
Teacher writes and says: "She is my friend."
(pointing to a girl in a picture or student).
-
Students repeat each sentence in chorus and
individually.
-
Asking/Answering
Questions:
-
Teacher writes and says: "Do you have a sister?"
Students respond: "Yes, I do." or "No, I don’t."
-
Teacher repeats with "brother," "grandmother,"
and "grandfather."
-
Teacher can use gestures to help students
understand the questions (e.g., pointing to a sister if asking
about a sister).
III. Activities (15
minutes)
-
"My Family and Friends" Drawings:
Students draw a picture of
their family and one or two friends. Then, they point to each
person and say, "This is my [family member]" or "He/She is my
friend."
-
"Family Tree" Practice: If a simple family tree chart was
introduced earlier or is provided, students can point to different
members on the chart and name them. Teacher can ask questions like, "Who is
this?"
-
Question and Answer Pairs:
Students work in pairs.
One student asks, "Do you have a sister/brother/etc.?" and the
other student answers. They take turns asking and
answering.
-
"Guess Who My Friend Is":
One student thinks of a
friend (without saying their name) and gives simple clues (e.g.,
"He is a boy," "He likes to play football"). Other students can ask
"Yes/No" questions like "Is he your best friend?" to guess who the
friend is.
IV. Preparation for the Next Stage (5
minutes)
-
Review: Briefly review the vocabulary
for family and friends, and the question-answer patterns
learned.
-
Preview of Future
Lessons: "In our next lessons, we will
learn more about describing people and talking about what we like
to do with our family and friends."
-
Homework
(Optional): "Draw a picture of your family
and label each member with their English name. Also, think about
your best friend and be ready to say 'He/She is my best
friend.'"
V. Conclusion (5
minutes)
-
Role-Playing:
Teacher can create simple
role-playing scenarios, such as meeting a new classmate and talking
about their family and friends.
Students can volunteer to act out the
scenarios.
-
Positive
Reinforcement: "Fantastic job talking about
your family and friends in English
today! You are all becoming great English
speakers."
|
Performs
exercises
Performs exercises
Performs text-related tasks
Performs text-related tasks
Performs text-related tasks
Performs text-related tasks
Performs exercises
Performs text-related tasks
Performs exercises
Performs text-related tasks
Performs text-related
tasks
|
Using the thumb method
The "wonderful,
good, wonderful" method
Through a
traffic light
The "wonderful,
good, wonderful" method
Through a
traffic light
The "wonderful,
good, wonderful" method
Through a
traffic light
The "wonderful,
good, wonderful" method
Through a
traffic light
|
|
|
End of lesson
5 min
Reflection
|
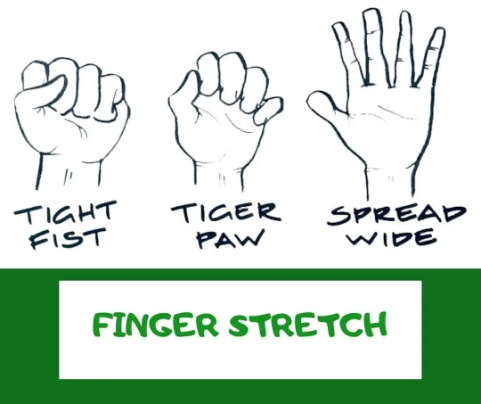
|
Creates feedback
|
|
|
Short-term plan-11-12
|
Teacher name:
|
|
|
Date:
|
|
|
Grade:
|
|
Number present:
|
absent:
|
|
Theme of the lesson
|
Classroom Objects and
Commands
|
|
Lesson objectives
|
- Teach names of classroom objects (desk,
chair, pencil, book)
Reinforce TPR (Total Physical
Response) with commands (stand up, sit down)
|
Lessonaction
|
Lessonperiod / time
|
Teacher's action
|
Studentaction
|
Evaluation
|
Resources
|
|
The beginning of the
lesson
10 min
|
Greeting learners.
|
-
the mood will rise
-
will be ready for the lesson. answer
questions
-
|
The method of "verbal
encouragement"
|
|
|
|
Lesson 11: Classroom Objects
I. Organizational Stage (5
minutes)
-
Greeting and
Review: "Hello everyone! How are you
today?" (Briefly review family and friends vocabulary if
appropriate).
-
Checking
Attendance: Briefly take
attendance.
-
Lesson Topic
Introduction: "Today, we are going to learn
the names of things we see in our classroom in
English."
-
Lesson
Objectives: "By the end of this lesson,
you will be able to recognize and say the English words for desk,
chair, board, pencil, book, and
ruler."
II. Introducing New Material (20
minutes)
-
Introducing "Desk"
and "Chair":
-
Teacher points to a desk and
says, "This is a desk." Writes "desk" on the
board. Students repeat.
-
Teacher points to a chair and
says, "This is a chair." Writes "chair" on the
board. Students repeat.
-
Teacher can ask simple questions like, "Where is
your desk?" (Students can point). "Where is your
chair?"
-
Introducing
"Board":
-
Teacher points to the board
and says, "This is a board." Writes "board" on the
board. Students repeat.
-
Teacher can ask, "What color is the board?" (If
colors have been taught).
-
Introducing
"Pencil":
-
Teacher holds up a pencil and
says, "This is a pencil." Writes "pencil" on the
board. Students repeat.
-
Teacher asks, "Do you have a pencil?" (Students
can show their pencils).
-
Introducing
"Book":
-
Teacher holds up a book and
says, "This is a book." Writes "book" on the
board. Students repeat.
-
Teacher asks, "Do you have a book?" (Students can
show their books).
-
Introducing
"Ruler":
-
Teacher holds up a ruler and
says, "This is a ruler." Writes "ruler" on the
board. Students repeat.
-
Teacher asks, "Do you have a ruler?" (Students
can show their rulers if they have them).
-
Simple Sentence
Practice:
-
Teacher points to each object
again and says, "This is a desk," "This is a chair,"
etc. Students repeat the full
sentences.
III. Activities (15
minutes)
-
"Touch the Object" Game:
Teacher says the name of a
classroom object (e.g., "Touch the board").
Students touch the correct
object.
-
"What is it?" Game: Teacher points to a classroom object,
and students say the English name.
-
Classroom Object Flashcards:
Teacher shows flashcards
with pictures of the classroom objects. Students say the name of
the object on the flashcard.
-
Matching Objects and Words:
Teacher can prepare simple
worksheets with pictures of the classroom objects on one side and
the English words on the other. Students draw lines to match the
pictures with the words.
IV. Preparation for the Next Stage (5
minutes)
-
Review: Briefly review all the
classroom object words learned in the
lesson.
-
Preview of Next
Lesson: "In our next lesson, we will
learn some actions we can do in the classroom, like 'stand up' and
'sit down'."
-
Homework
(Optional): "Try to find these objects at
home and say their English names."
V. Conclusion (5
minutes)
-
"I Spy" with Classroom
Objects: Teacher says, "I spy with my
little eye something that is [color] and is a [classroom
object]." Students guess the object using the English
name.
-
Positive
Reinforcement: "Excellent work learning the
names of classroom objects today!
You
are all doing great."
Lesson 12: Classroom Commands
I. Organizational Stage (5
minutes)
-
Greeting and
Review: "Hello everyone! How are you
today?" (Briefly review classroom object vocabulary from the
previous lesson by asking students to name some
objects).
-
Checking
Attendance: Briefly take
attendance.
-
Lesson Topic
Introduction: "Today, we are going to learn
some actions we can do in the classroom in
English."
-
Lesson
Objectives: "By the end of this lesson,
you will be able to understand and respond physically to the
commands: stand up, sit down, open your book, and close your
book."
II. Introducing New Material (20
minutes)
-
Introducing "Stand
Up":
-
Teacher says "Stand up" and demonstrates the
action of standing up. Writes "stand up" on the board. Students
repeat the command and stand up.
-
Teacher can say "Stand up, please." to introduce
politeness.
-
Introducing "Sit
Down":
-
Teacher says "Sit down" and demonstrates the
action of sitting down. Writes "sit down" on the board. Students
repeat the command and sit down.
-
Teacher can say "Sit down,
please."
-
Introducing "Open
Your Book":
-
Teacher holds up a book and says "Open your book"
and demonstrates opening a book. Writes "open your book" on the
board. Students repeat the command and open their
books.
-
Teacher can say "Open your book,
please."
-
Introducing "Close
Your Book":
-
Teacher holds up an open book and says "Close
your book" and demonstrates closing a book. Writes "close your
book" on the board. Students repeat the command and close their
books.
-
Teacher can say "Close your book,
please."
-
Total Physical
Response (TPR):
-
Teacher gives the commands one by one, and
students respond physically.
-
Teacher can say the commands in a random
order.
-
Teacher can also say the command and perform the
action along with the students.
III. TPR Exercises and Practice (15
minutes)
-
Simon Says: Teacher plays "Simon Says" using the
commands learned. "Simon says, stand up." "Sit down." (Students
only follow commands that start with "Simon
says").
-
Following Instructions: Teacher gives a series of instructions
for students to follow:
-
Combining Objects and Commands:
Teacher gives commands
that include classroom objects:
-
"Command Cards": Teacher can prepare cards with the
written commands on them. Teacher shows a card, and students read
the command and perform the action.
IV. Preparation for the Next Stage (5
minutes)
-
Review: Briefly review all the action
commands learned in the lesson.
-
Preview of Future
Lessons: "In our next lessons, we will
learn more classroom objects and more actions we can
do."
-
Homework
(Optional): "Practice saying these
commands at home and try to get your family members to do the
actions!"
V. Conclusion (5
minutes)
-
Command
Game: Students take turns giving the
commands to the class.
-
Positive
Reinforcement: "Excellent work following
instructions in English today!
You
all listened very well."
|
Performs
exercises
Performs exercises
Performs text-related tasks
Performs text-related tasks
Performs text-related tasks
Performs text-related tasks
Performs exercises
Performs text-related tasks
Performs exercises
|
Using the thumb method
The "wonderful,
good, wonderful" method
Through a
traffic light
The "wonderful,
good, wonderful" method
Through a
traffic light
The "wonderful,
good, wonderful" method
Through a
traffic light
|
|
|
End of lesson
5 min
|
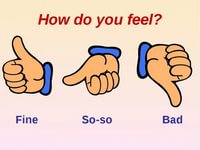
|
Creates feedback
|
|
|
hort-term plan-13-14
|
Teacher name:
|
|
|
Date:
|
|
|
Grade:
|
|
Number present:
|
absent:
|
|
Theme of the lesson
|
Days of the Week and Daily
Routines
|
|
Lesson objectives
|
- Introduce days
(Monday–Sunday)
Use the simple present tense for
daily activities (“I wake up at 7 AM”)
|
Lessonaction
|
Lessonperiod / time
|
Teacher's action
|
Studentaction
|
Evaluation
|
Resources
|
|
The beginning of the
lesson
10 min
|
Greeting learners.
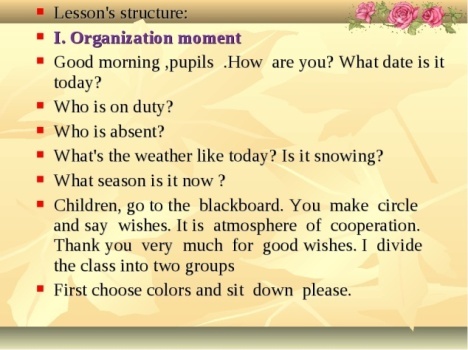
|
-
the mood will rise
-
will be ready for the lesson. answer
questions
-
|
The method of "verbal
encouragement"
|
|
|
|
Lesson 13: Days of the Week and Basic Daily
Actions
I. Organizational
Stage (5 minutes)
-
Greeting and
Review: "Hello everyone! How are you
today?" (Briefly review classroom objects and commands if
appropriate).
-
Checking
Attendance: Briefly take
attendance.
-
Lesson Topic
Introduction: "Today, we are going to learn
the names of the days of the week and some things we do every day
in English."
-
Lesson
Objectives: "By the end of this lesson,
you will be able to recognize and say the English names for the
days of the week and some basic daily
actions."
II. Introducing New Material (20
minutes)
-
Days of the Week (Pronunciation and
Visuals):
-
Teacher writes the days of the week on the board,
clearly pronouncing each day:
-
Monday
-
Tuesday
-
Wednesday
-
Thursday
-
Friday
-
Saturday
-
Sunday
-
Teacher can use a visual calendar or flashcards
for each day.
-
Students repeat each day in chorus and
individually.
-
Teacher can ask, "What day is
today?" (Wednesday). "What day was
yesterday?" (Tuesday). "What day is tomorrow?"
(Thursday).
-
Basic Daily Actions (Visuals and
Actions):
-
Matching Days and Actions:
Teacher can draw simple
pictures representing the actions next to the days of the week
(e.g., a picture of a school bus next to Monday to Friday, a
picture of a bed next to Sunday).
III. Activities (15
minutes)
-
"Days of the Week" Chant:
Teacher leads a simple
chant, repeating the days of the week in order.
Students can clap or tap
along.
-
"Action Time": Teacher says an action (e.g., "Wake
up!"), and students act it out.
-
"What day do you...?" Game:
Teacher asks, "What day do
you go to school?" Students answer with the days they go to school.
Teacher can adapt this for other
actions.
-
"Picture Sequencing": Teacher can provide students with
pictures representing the daily actions and ask them to put the
pictures in the order they usually do
them.
IV. Preparation for the Next Stage (5
minutes)
-
Review: Briefly review the days of the
week and the basic daily actions
learned.
-
Preview of Next
Lesson: "In our next lesson, we will
learn how to talk about when we do these things using
time."
-
Homework
(Optional): "Try to say the days of the
week in English at home. Also, think about what you do every day
and try to say the English words for those
actions."
V. Conclusion (5
minutes)
-
"Days of the Week"
Song: Teacher and students sing a
simple song about the days of the
week.
-
Positive
Reinforcement: "Great job learning the days
of the week and daily actions today!
You
are all doing very well."
Lesson 14: Describing Daily Routines and Making a
Schedule
I. Organizational
Stage (5 minutes)
-
Greeting and
Review: "Hello everyone! How are you
today?" (Briefly review the days of the week and daily actions from
the previous lesson).
-
Checking
Attendance: Briefly take
attendance.
-
Lesson Topic
Introduction: "Today, we are going to learn
how to talk about our daily routines and make a schedule in
English."
-
Lesson
Objectives: "By the end of this lesson,
you will be able to use simple present tense to describe your daily
routines and create a basic weekly
schedule."
II. Introducing New Material (20
minutes)
-
Review of Days and Actions:
Quickly review the days of
the week and the daily actions using flashcards or by asking
students.
-
Using Simple Present Tense
("I"):
-
Teacher writes on the board:
"I wake up." and says it clearly.
Students repeat.
-
Teacher does the same for the other actions: "I
eat breakfast," "I go to school," "I do homework," "I go to
bed."
-
Teacher emphasizes that we use this form to talk
about things we do regularly.
-
Introducing Time Expressions ("at
[time]"):
-
Teacher introduces simple times (e.g., 7 o'clock,
8 o'clock). Teacher can use a visual clock.
-
Teacher combines actions with
time: "I wake up at 7 o'clock." Writes it on the
board. Students repeat.
-
Teacher does the same for other actions, using
plausible times for their routine (e.g., "I eat breakfast at 7:30,"
"I go to school at 8 o'clock," etc.).
-
Asking and Answering Simple
Questions:
-
Teacher asks, "What time do
you wake up?" Students can answer with "I wake up at
[time]." (Teacher provides support with time if
needed).
-
Teacher asks similar questions for other daily
actions.
III. Making a Weekly Schedule or Timetable (15
minutes)
-
Introducing the Concept:
Teacher explains what a
weekly schedule or timetable is – a plan for what you do on
different days of the week. Teacher can show a simple example on the
board.
-
Creating a Class Schedule (Collaborative
Activity):
-
Teacher guides the students to create a simple
class schedule on the board together.
-
Teacher asks: "What do we do on Monday?" (Go to
school). "What time do we start school?" (e.g., 8 o'clock). Teacher
writes "Monday: Go to school at 8 o'clock."
-
Teacher continues for the other days of the week,
focusing on school days and perhaps a simple activity for the
weekend (e.g., "Saturday: Play games," "Sunday:
Rest").
-
Individual
Schedules (Simple Version):
-
Teacher can provide a simple template with the
days of the week written down.
-
Students can draw pictures or write (if their
writing skills allow) one main activity they do on each
day.
-
For
younger learners, focusing on one key activity per day is
sufficient.
IV. Preparation for the Next Stage (5
minutes)
-
Review: Briefly review the days of the
week, daily actions, and how to use simple present tense with "I"
and time.
-
Preview of Future
Lessons: "In our next lessons, we will
learn more verbs to describe other activities we
do."
-
Homework
(Optional): "Try to ask your family
members what time they do different things every day. You can also
try to draw your own daily
schedule."
V. Conclusion (5
minutes)
-
Sharing
Schedules: Students who are comfortable
can share one or two things from their simple weekly
schedule.
-
Positive
Reinforcement: "Excellent work talking about
your daily routines and making schedules
today! You are becoming very good at
English."
|
Performs
exercises
Performs exercises
Performs text-related tasks
Performs text-related tasks
Performs text-related tasks
Performs text-related tasks
Performs exercises
|
Using the thumb method
The "wonderful,
good, wonderful" method
Through a
traffic light
The "wonderful,
good, wonderful" method
Through a
traffic light
|
|
|
End of lesson
5 min
|
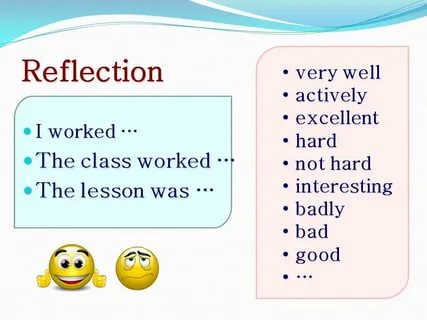
|
|
|
|
Short-term plan-15-16
|
Teacher name:
|
|
|
Date:
|
|
|
Grade:
|
|
Number present:
|
absent:
|
|
Theme of the lesson
|
Weather and
Seasons
|
|
Lesson objectives
|
- Teach weather vocabulary (sunny, rainy,
cloudy) and seasons (spring, summer, autumn,
winter)
Practice simple weather
expressions
|
Lessonaction
|
Lessonperiod / time
|
Teacher's action
|
Studentaction
|
Evaluation
|
Resources
|
|
The beginning of the
lesson
10 min
|
Greeting learners.

|
-
the mood will rise
-
will be ready for the lesson. answer
questions
-
|
The method of "verbal
encouragement"
|
|
|
|
Lesson 15: Weather Words
I. Organizational Stage (5
minutes)
-
Greeting and
Review: "Hello everyone! How are you
today?" (Briefly review days of the week and daily routines if
appropriate).
-
Checking
Attendance: Briefly take
attendance.
-
Lesson Topic
Introduction: "Today, we are going to learn
words to describe the weather in
English."
-
Lesson
Objectives: "By the end of this lesson,
you will be able to recognize and say the English words for sunny,
rainy, windy, snowy, and cloudy, and ask and answer the question
'What's the weather like?'"
II. Introducing New Material (20
minutes)
-
Introducing
"Sunny":
-
Teacher points to a picture of
a sunny day or draws a sun on the board and says, "It's
sunny." Writes "sunny" on the board. Students
repeat.
-
Teacher can ask, "Is it sunny
today?" (Looking outside).
-
Introducing
"Rainy":
-
Teacher points to a picture of
a rainy day or makes rain sounds and says, "It's
rainy." Writes "rainy" on the board. Students
repeat.
-
Teacher can ask, "Do you like rainy
days?"
-
Introducing
"Windy":
-
Teacher can make blowing
sounds or show a picture of trees blowing and says, "It's
windy." Writes "windy" on the board. Students
repeat.
-
Teacher can ask, "Is it windy
today?"
-
Introducing
"Snowy":
-
Teacher points to a picture of
a snowy day or pretends to shiver and says, "It's
snowy." Writes "snowy" on the board. Students
repeat.
-
Teacher can ask, "Do you like snowy days?"
(Considering the time of year, this might be relevant or a memory
of the recent past).
-
Introducing
"Cloudy":
-
Teacher points to a picture of
a cloudy day or draws clouds on the board and says, "It's
cloudy." Writes "cloudy" on the board. Students
repeat.
-
Teacher can ask, "Is it cloudy
today?"
-
The Question "What's the weather
like?":
III. Activities (15
minutes)
-
"Weather Flashcards": Teacher shows flashcards with pictures
representing each weather condition. Students say the weather word.
-
"Act Out the Weather": Teacher says a weather word (e.g.,
"Windy"), and students act it out (e.g., swaying like
trees).
-
"What's the Weather Like Today?"
Routine: Teacher asks individual students, "What's the weather like
today?" and encourages them to look outside and
answer.
-
"Weather Matching": Teacher can prepare simple worksheets
with pictures of weather conditions on one side and the English
words on the other. Students draw lines to match the pictures with
the words.
IV. Preparation for the Next Stage (5
minutes)
-
Review: Briefly review all the weather
words learned in the lesson and the question "What's the weather
like?"
-
Preview of Next
Lesson: "In our next lesson, we will
learn about the four seasons of the year and how the weather is in
each season."
-
Homework
(Optional): "Look at the weather tomorrow
and try to say what it's like in
English."
V. Conclusion (5
minutes)
-
"Weather
Song": Teacher and students sing a
simple song about the weather.
-
Positive
Reinforcement: "Great job learning about the
weather today! You can now describe different kinds of weather in
English."
Lesson 16: Seasons and Seasonal
Descriptions
I. Organizational Stage (5
minutes)
-
Greeting and
Review: "Hello everyone! How are you
today?" (Briefly review weather words from the previous lesson by
showing flashcards).
-
Checking
Attendance: Briefly take
attendance.
-
Lesson Topic
Introduction: "Today, we are going to learn
about the four seasons of the year and how the weather changes in
each season."
-
Lesson
Objectives: "By the end of this lesson,
you will be able to name the four seasons in English (spring,
summer, autumn/fall, winter) and describe the typical weather in
each season."
II. Introducing New Material (20
minutes)
-
Introducing the Four Seasons
(Visuals):
-
Seasonal
Descriptions:
-
Teacher says and writes on the
board:
-
"In
spring, it's often sunny and sometimes rainy."
-
"In
summer, it's usually hot and sunny."
-
"In
autumn/fall, it's often windy and sometimes
rainy."
-
"In
winter, it's usually cold and snowy."
-
Teacher explains each
sentence, relating it to the pictures.
Students repeat each
sentence.
-
Asking and Answering Questions about
Seasons:
-
Teacher asks, "What season is
it now?" (Considering the current date of March 19, 2025, the
answer is likely transitioning into
spring). Students answer, "It's
spring."
-
Teacher asks, "What's the weather like in
summer?" Students can answer with "It's hot and
sunny."
-
Teacher asks similar questions for the other
seasons.
III. Activities (15
minutes)
-
"Season Sorting": Teacher can provide pictures of
different weather conditions or activities and ask students to sort
them into the correct season (e.g., picture of snow goes with
winter, picture of swimming goes with
summer).
-
"My Favorite Season": Teacher asks students, "What's your
favorite season?" and encourages them to say why, using simple
words or phrases (e.g., "I like summer because it's
hot.").
-
Mini Role-Play: Weather
Forecast:
-
Divide students into small
groups.
-
Each group pretends to be weather reporters
giving a forecast for a different season. They can use the weather
words and seasonal descriptions they have
learned.
-
Example: "Hello, today is the
weather report for summer. It is hot and
sunny. Remember to drink lots of
water!"
IV. Preparation for the Next Stage (5
minutes)
-
Review: Briefly review the four
seasons and the typical weather in each
season.
-
Preview of Future
Lessons: "In our next lessons, we will
learn about clothes we wear in different kinds of
weather."
-
Homework
(Optional): "Draw a picture of your
favorite season and write one sentence about the weather in that
season."
V. Conclusion (5
minutes)
-
"Season
Wheel": Teacher can draw a simple
wheel divided into four sections, each representing a season.
Students can spin an arrow and say the season it lands on and one
word to describe the weather in that
season.
-
Positive
Reinforcement: "Excellent work learning about
the seasons today! You can now talk about the weather in different
seasons in English."
|
Performs
exercises
Performs exercises
Performs text-related tasks
Performs text-related tasks
Performs text-related tasks
Performs text-related tasks
Performs exercises
Performs text-related tasks
Performs exercises
|
Using the thumb method
The "wonderful,
good, wonderful" method
Through a
traffic light
The "wonderful,
good, wonderful" method
Through a
traffic light
The "wonderful,
good, wonderful" method
Through a
traffic light
|
|
|
End of lesson
5 min
|
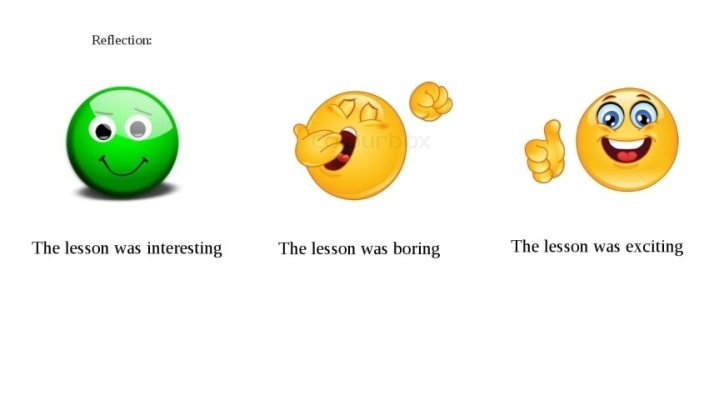
|
Creates feedback
|
|
|
Short-term plan-17-18
|
Teacher name:
|
|
|
Date:
|
|
|
Grade:
|
|
Number present:
|
absent:
|
|
Theme of the lesson
|
Animals and
Nature
|
|
Lesson objectives
|
- Introduce common animal names (dog, cat,
lion, tiger)
Discuss nature terms (tree, flower,
grass)
|
Lessonaction
|
Lessonperiod / time
|
Teacher's action
|
Studentaction
|
Evaluation
|
Resources
|
|
The beginning of the
lesson
10 min
|
Greeting learners.
|
-
the mood will rise
-
will be ready for the lesson. answer
questions
-
|
The method of "verbal
encouragement"
|
|
|
|
Lesson 17: Animal Names
I. Organizational Stage (5
minutes)
-
Greeting and
Review: "Hello everyone! How are you
today?" (Briefly review weather and seasons if
appropriate).
-
Checking
Attendance: Briefly take
attendance.
-
Lesson Topic
Introduction: "Today, we are going to learn
the names of some animals in
English."
-
Lesson
Objectives: "By the end of this lesson,
you will be able to recognize and say the English names for dog,
cat, lion, tiger, elephant, and bird, and understand the difference
between pets and wild animals."
II. Introducing New Material (20
minutes)
-
Introducing "Dog"
and "Cat":
-
Teacher shows a picture of a
dog and says, "This is a dog." Writes "dog" on the
board. Students repeat.
-
Teacher asks, "Does anyone have a dog at
home?"
-
Teacher shows a picture of a
cat and says, "This is a cat." Writes "cat" on the
board. Students repeat.
-
Teacher asks, "Does anyone have a cat at
home?"
-
Teacher explains that dogs and cats are often
pets. Writes "pet" on the board.
-
Introducing "Lion"
and "Tiger":
-
Teacher shows a picture of a
lion and says, "This is a lion." Writes "lion" on the
board. Students repeat.
-
Teacher says, "A lion is big."
-
Teacher shows a picture of a
tiger and says, "This is a tiger." Writes "tiger" on the
board. Students repeat.
-
Teacher says, "A tiger is also
big."
-
Teacher explains that lions and tigers are wild
animals. Writes "wild animal" on the board.
-
Introducing
"Elephant":
-
Teacher shows a picture of an
elephant and says, "This is an
elephant." Writes "elephant" on the board. Students
repeat.
-
Teacher says, "An elephant is very
big."
-
Teacher explains that elephants are wild
animals.
-
Introducing
"Bird":
-
Teacher shows a picture of a
bird and says, "This is a bird." Writes "bird" on the
board. Students repeat.
-
Teacher asks, "What color is this bird?" (If
colors have been taught).
-
Teacher explains that some birds can be pets, and
some are wild.
III. Activities (15
minutes)
-
"Animal Sounds": Teacher makes the sounds of the
animals (bark, meow, roar, etc.), and students guess the animal in
English.
-
"Animal Flashcards": Teacher shows flashcards with pictures
of the animals. Students say
the name of the animal.
-
Sorting Animals (Pets vs. Wild):
Teacher can have two
labeled columns on the board (Pets/Wild Animals). Teacher shows
pictures of the animals (and perhaps a few more simple ones like
rabbit, cow) and asks students to say if it's a pet or a wild
animal, placing the picture in the correct
column.
-
Describing Animals: Teacher shows a picture of one of the
animals and says, "A [animal] is [size/characteristic]." (e.g., "A
cat is small," "A lion is yellow"). Students repeat and can try to
think of other simple descriptions.
IV. Preparation for the Next Stage (5
minutes)
-
Review: Briefly review all the animal
names learned in the lesson and the difference between pets and
wild animals.
-
Preview of Next
Lesson: "In our next lesson, we will
learn the names of things we see in nature, like trees and
flowers."
-
Homework
(Optional): "Try to find pictures of these
animals at home and say their English names. Can you also think if
they are pets or wild animals?"
V. Conclusion (5
minutes)
-
"Animal
Charades": Teacher (or students, if
comfortable) can act out an animal, and students guess the animal
in English.
-
Positive
Reinforcement: "Excellent work learning about
animals today! You know many animal names in English
now."
Lesson 18: Nature Words and
Descriptions
I. Organizational Stage (5
minutes)
-
Greeting and
Review: "Hello everyone! How are you
today?" (Briefly review animal names from the previous lesson by
showing flashcards).
-
Checking
Attendance: Briefly take
attendance.
-
Lesson Topic
Introduction: "Today, we are going to learn
the names of things we see in nature in
English."
-
Lesson
Objectives: "By the end of this lesson,
you will be able to recognize and say the English words for tree,
flower, grass, river, and mountain, and describe animals using
simple sentences."
II. Introducing New Material (20
minutes)
-
Review of Animal Names: Quickly review the animal names (dog,
cat, lion, tiger, elephant, bird) using
flashcards.
-
Introducing
"Tree":
-
Teacher points to a tree
outside the window (if visible) or shows a picture of a tree and
says, "This is a tree." Writes "tree" on the board. Students
repeat.
-
Teacher can ask, "What color are the leaves on
the tree?"
-
Introducing
"Flower":
-
Teacher shows a picture of a
flower or a real flower (if available) and says, "This is a
flower." Writes "flower" on the board. Students
repeat.
-
Teacher can ask, "What color is this
flower?"
-
Introducing
"Grass":
-
Teacher can point to grass
outside or show a picture and says, "This is
grass." Writes "grass" on the board. Students
repeat.
-
Teacher can ask, "What color is the
grass?"
-
Introducing
"River":
-
Teacher shows a picture of a
river and says, "This is a river." Writes "river" on the
board. Students repeat.
-
Teacher can say, "A river has
water."
-
Introducing
"Mountain":
-
Teacher shows a picture of a
mountain and says, "This is a
mountain." Writes "mountain" on the board. Students
repeat.
-
Teacher can say, "Mountains are very big."
(Relate to any local mountains if applicable).
III. Activities (15
minutes)
-
"Nature Flashcards": Teacher shows flashcards with pictures
of the nature words. Students
say the name of the object.
-
"Where do they live?" Game:
Teacher says an animal
name, and students say if it lives near trees, grass, in a river,
or perhaps in the mountains (depending on the animal and their
knowledge).
-
Describing Animals and Their
Habitat: Teacher shows a picture of an animal and asks, "What is
it?" Then asks, "Where does it live?" (e.g., "A lion. It lives near
trees and grass."). Teacher can prompt with sentence starters: "A
[animal] is..." "It
lives..."
-
Nature-Related Picture Descriptions:
Teacher shows a picture
that includes animals and nature elements (e.g., a bird on a tree
near a river). Teacher asks simple questions: "What do you see?"
Students can answer with single words or short sentences they
know.
IV. Preparation for the Next Stage (5
minutes)
-
Review: Briefly review all the nature
words learned in the lesson.
-
Preview of Future
Lessons: "In our next lessons, we will
learn about more animals and talk about what animals can
do."
-
Homework
(Optional): "Try to find these things in
nature around your home or school and say their English names. Can
you also try to describe an animal using a nature
word?" (e.g., "A bird is in a
tree.")
V. Conclusion (5
minutes)
-
"Draw
Nature": Teacher asks students to draw
a picture of a natural scene with some animals and nature elements
they have learned. They can then label some of the things in their
picture in English.
-
Positive
Reinforcement: "Excellent work learning about
nature today! You know many new words in
English."
|
Performs
exercises
Performs exercises
Performs text-related tasks
Performs text-related tasks
Performs text-related tasks
Performs text-related tasks
Performs exercises
Performs text-related tasks
Performs exercises
Performs text-related tasks
Performs text-related
tasks
|
Using the thumb method
The "wonderful,
good, wonderful" method
Through a
traffic light
The "wonderful,
good, wonderful" method
Through a
traffic light
The "wonderful,
good, wonderful" method
Through a
traffic light
The "wonderful,
good, wonderful" method
Through a
traffic light
|
|
|
End of lesson
5 min
|
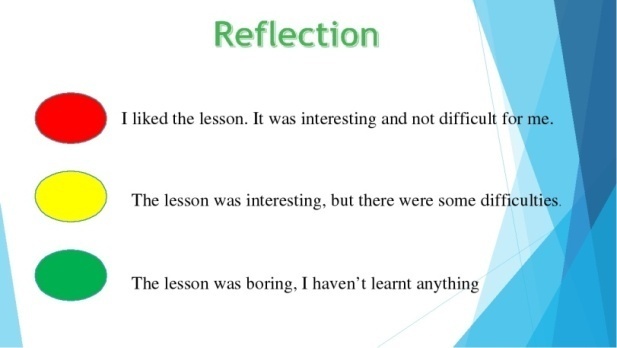
|
Creates feedback
|
|
|
Short-term plan-19-20
|
Teacher name:
|
|
|
Date:
|
|
|
Grade:
|
|
Number present:
|
absent:
|
|
Theme of the lesson
|
Food and Drinks
|
|
Lesson objectives
|
- Present basic food items (fruit, vegetables,
snacks) and drinks (water, juice)
Express likes/dislikes (“I like
apples”)
|
Lessonaction
|
Lessonperiod / time
|
Teacher's action
|
Studentaction
|
Evaluation
|
Resources
|
|
The beginning of the
lesson
10 min
|
Greeting learners.

|
-
the mood will rise
-
will be ready for the lesson. answer
questions
-
|
The method of "verbal
encouragement"
|
|
|
|
Lesson 19: Common Foods and
Drinks
I. Organizational Stage (5
minutes)
-
Greeting and
Review: "Hello everyone! How are you
today?" (Briefly review animals and nature words if
appropriate).
-
Checking
Attendance: Briefly take
attendance.
-
Lesson Topic
Introduction: "Today, we are going to learn
the names of some common foods and drinks in
English."
-
Lesson
Objectives: "By the end of this lesson,
you will be able to recognize and say the English words for apple,
banana, bread, pizza, soup, rice, water, juice, milk, tea, and
coffee, and express simple likes and
dislikes."
II. Introducing New Material (20
minutes)
-
Introducing Common Foods (Visuals and
Realia):
-
Teacher shows a real apple or
a picture and says, "This is an apple."
Writes "apple" on the board. Students
repeat.
-
Teacher does the same for banana, bread, pizza
(picture), soup (picture or gesture), and rice (show uncooked rice
or picture). Writes each word on the board and has students
repeat.
-
Introducing Drinks (Visuals and
Realia):
-
Teacher shows a bottle of
water or a picture and says, "This is
water." Writes "water" on the board. Students
repeat.
-
Teacher does the same for juice (show a carton or
picture), milk (show a carton or picture), tea (show a tea bag or
picture), and coffee (show instant coffee or picture). Writes each
word on the board and has students repeat.
-
Pronunciation Practice: Teacher repeats each food and drink
word, and students repeat in chorus and individually. Pay attention
to sounds that might be different in their native
language.
-
Expressing
Preferences ("I like"):
-
Teacher holds up an apple and
says, "I like apples." Writes "I like apples" on the
board. Students repeat.
-
Teacher repeats with other foods and drinks,
encouraging students to say "I like
[food/drink]."
-
Expressing Preferences ("I don't
like"):
-
Teacher holds up a picture of a carrot (or
another food not on the list but easily recognizable) and says, "I
don't like carrots." Writes "I don't like carrots" on the board.
Students repeat.
-
Teacher introduces the phrase "I don't like" and
encourages students to say things they don't like (using the
vocabulary learned or other simple food words they might
know).
III. Activities (15
minutes)
-
"Food and Drink Flashcards":
Teacher shows flashcards
with pictures of the foods and drinks. Students say the English name.
-
"Touch the Food/Drink": Teacher says the name of a food or
drink, and students point to the correct picture or real object (if
available).
-
"Do you like...?" Question:
Teacher holds up a picture
of a food or drink and asks, "Do you like [food/drink]?" Students
can answer with "Yes, I do" or "No, I
don't."
-
"My Favorite Food/Drink":
Teacher asks students,
"What's your favorite food?" and "What's your favorite
drink?" Encourage them to
answer using the vocabulary learned.
IV. Preparation for the Next Stage (5
minutes)
-
Review: Briefly review all the food
and drink words learned in the lesson and the phrases "I like" and
"I don't like."
-
Preview of Next
Lesson: "In our next lesson, we will
learn how to ask for food and drinks
politely."
-
Homework
(Optional): "Try to say the English names
of the foods and drinks you eat and drink at
home."
V. Conclusion (5
minutes)
-
"Food and Drink
Bingo": Teacher can call out food and
drink words, and students can mark them off on a simple bingo card
with pictures or words.
-
Positive
Reinforcement: "Excellent work learning about
food and drinks today! You know many new words in
English."
Lesson 20: Expressing Preferences and Polite
Requests
I. Organizational
Stage (5 minutes)
-
Greeting and
Review: "Hello everyone! How are you
today?" (Briefly review food and drink vocabulary and "I like/don't
like" from the previous lesson).
-
Checking
Attendance: Briefly take
attendance.
-
Lesson Topic
Introduction: "Today, we are going to learn
how to ask for food and drinks politely in
English."
-
Lesson
Objectives: "By the end of this lesson,
you will be able to use the polite requests 'Can I have...?' and
'Would you like...?' to ask for and offer food and
drinks."
II. Introducing New Material (20
minutes)
-
Review of Food and Drinks:
Quickly review the
vocabulary for apple, banana, bread, pizza, soup, rice, water,
juice, milk, tea, and coffee using flashcards or by asking
students.
-
Polite Request: "Can I
have...?"
-
Teacher holds up a picture of
an apple and says, "Can I have an apple, please?" Writes "Can I
have an apple, please?" on the board.
Students repeat.
-
Teacher explains that this is a polite way to ask
for something.
-
Teacher repeats with other food and drink items,
encouraging students to practice the phrase.
-
Polite Request: "Would you
like...?"
-
Teacher holds up a picture of juice and says,
"Would you like some juice?" Writes "Would you like some juice?" on
the board. Students repeat.
-
Teacher explains that this is a polite way to
offer something to someone.
-
Teacher repeats with other food and drink items,
encouraging students to practice the phrase.
-
Possible Responses: Teacher introduces simple
responses:
-
To
"Can I have...?" - "Yes, here you are." / "Sure."
-
To
"Would you like...?" - "Yes, please." / "No, thank
you."
III. Role-Play Scenarios (15
minutes)
-
"Ordering at a Cafe"
(Teacher-Student): Teacher pretends to be a server, and
students take turns ordering food or drinks using "Can I
have...?"
-
Teacher: "Hello, what would you
like?"
-
Student: "Can I have a juice,
please?"
-
Teacher: "Yes, here you are."
-
"Offering Food to a Friend" (Pair
Work): Students work in pairs. One student offers a food or drink
using "Would you like...?" and the other student responds with
"Yes, please" or "No, thank you." They can use picture cards or
just say the names.
-
Student 1: "Would you like some
bread?"
-
Student 2: "Yes, please." or "No, thank
you."
-
Using Menus (Optional): If available, teacher can provide
simple picture menus with the learned food and drinks. Students can
use these menus to practice ordering and
offering.
IV. Preparation for the Next Stage (5
minutes)
-
Review: Briefly review the polite
request phrases "Can I have...?"
and
"Would you like...?" and the possible
responses.
-
Preview of Future
Lessons: "In our next lessons, we will
learn more about different kinds of food and how to describe
them."
-
Homework
(Optional): "Try to use 'Can I have...?'
when asking for something at home, and 'Would you
like...?' when offering something to your
family."
V. Conclusion (5
minutes)
-
"Polite Request
Game": Teacher shows a picture of a
food or drink and asks students to make a polite request for it.
Then, teacher offers a food or drink and asks students to respond
politely.
-
Positive
Reinforcement: "Excellent work learning how
to make polite requests today! You are becoming very good at
speaking English in different
situations."
|
Performs
exercises
Performs exercises
Performs text-related tasks
Performs text-related tasks
Performs text-related tasks
Performs text-related tasks
Performs exercises
Performs text-related tasks
Performs exercises
Performs text-related tasks
Performs text-related
tasks
|
Using the thumb method
The "wonderful,
good, wonderful" method
Through a
traffic light
The "wonderful,
good, wonderful" method
Through a
traffic light
The "wonderful,
good, wonderful" method
Through a
traffic light
The "wonderful,
good, wonderful" method
Through a
traffic light
|
|
|
End of lesson
5 min
|
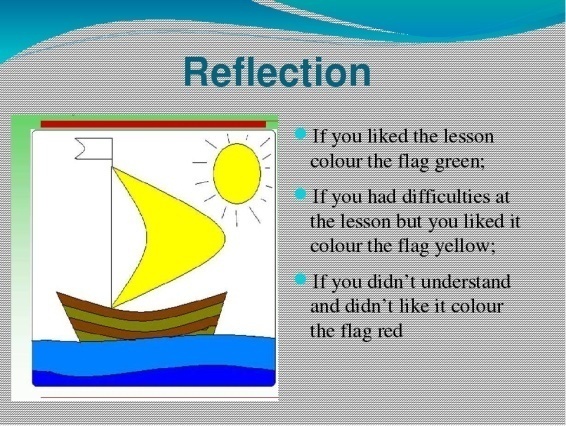
|
Creates feedback
|
|
|
Short-term plan-21-22
|
Teacher name:
|
|
|
Date:
|
|
|
Grade:
|
|
Number present:
|
absent:
|
|
Theme of the lesson
|
Parts of the
Body
|
|
Lesson objectives
|
- Teach body parts (head, shoulders, knees,
toes)
Reinforce through songs and
TPR
|
Lessonaction
|
Lessonperiod / time
|
Teacher's action
|
Studentaction
|
Evaluation
|
Resources
|
|
The beginning of the
lesson
10 min
|
Greeting learners.
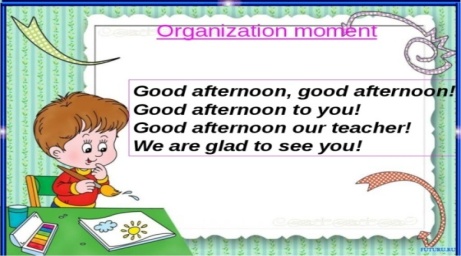
|
-
the mood will rise
-
will be ready for the lesson. answer
questions
-
|
The method of "verbal
encouragement"
|
|
|
|
Lesson 21: Basic Body Parts
I. Organizational Stage (5
minutes)
-
Greeting and
Review: "Hello everyone! How are you
today?" (Briefly review food and drinks if
appropriate).
-
Checking
Attendance: Briefly take
attendance.
-
Lesson Topic
Introduction: "Today, we are going to learn
the names of different parts of our body in
English."
-
Lesson
Objectives: "By the end of this lesson,
you will be able to recognize and say the English words for head,
shoulders, knees, toes, eyes, ears, mouth, and
nose."
II. Introducing New Material (20
minutes)
-
Introducing
"Head":
-
Introducing
"Shoulders":
-
Introducing
"Knees":
-
Introducing
"Toes":
-
Introducing
"Eyes":
-
Introducing
"Ears":
-
Introducing
"Mouth":
-
Introducing
"Nose":
III. Total Physical Response (TPR) and Song (15
minutes)
-
"Touch Your..." Game: Teacher says, "Touch your head,"
"Touch your shoulders," etc., and students touch the correct body
part. Teacher can vary the
speed.
-
"Simon Says": Teacher plays "Simon Says" using the
body parts learned (e.g., "Simon says, touch your
nose.").
-
"Head, Shoulders, Knees, and Toes"
Song:
-
Teacher introduces the song, singing it slowly
and pointing to each body part as it is
mentioned.
-
Students sing along and do the
actions.
-
Teacher can repeat the song several times,
gradually increasing the speed if appropriate.
IV. Preparation for the Next Stage (5
minutes)
-
Review: Briefly review all the body
part words learned in the lesson by pointing to different parts of
their body and asking students to name
them.
-
Preview of Next
Lesson: "In our next lesson, we will
learn more about our body and how to say how many of each part we
have."
-
Homework
(Optional): "Practice saying the names of
these body parts at home and touching
them."
V. Conclusion (5
minutes)
-
"Body Part Freeze
Dance": Teacher plays music. When the
music stops, teacher calls out a body part, and students have to
freeze touching that part.
-
Positive
Reinforcement: "Excellent work learning about
your body parts today! You all did a great job singing and
following instructions."
Lesson 22: More Body Parts and Simple
Statements
I. Organizational
Stage (5 minutes)
-
Greeting and
Review: "Hello everyone! How are you
today?" (Briefly review the body parts from the previous lesson by
playing "Touch Your...").
-
Checking
Attendance: Briefly take
attendance.
-
Lesson Topic
Introduction: "Today, we are going to learn
some more parts of our body and how to say how many we
have."
-
Lesson
Objectives: "By the end of this lesson,
you will be able to recognize and say the English words for arms,
legs, hands, feet, and hair, and make simple statements like 'I
have two eyes.'"
II. Introducing New Material (20
minutes)
-
Review of Basic Body Parts:
Quickly review head,
shoulders, knees, toes, eyes, ears, mouth, and
nose.
-
Introducing
"Arms":
-
Introducing
"Legs":
-
Introducing
"Hands":
-
Introducing
"Feet":
-
Introducing
"Hair":
-
Simple Statements
("I have..."):
-
Teacher says and writes on the
board: "I have one head." Students repeat.
-
Teacher says and writes on the
board: "I have two eyes." Students repeat.
-
Teacher continues with ears, arms, legs, hands,
and feet, emphasizing the number (one or two).
-
Teacher can ask individual students, "How many
eyes do you have?" and encourage them to answer with "I have two
eyes."
III. Activities (15
minutes)
-
"Point and Say": Teacher points to different body parts
(including the new ones), and students say the English
name.
-
"How Many?" Questions: Teacher asks questions like "How many
noses do you have?" "How many hands do you have?" Students answer
with "I have one nose," "I have two hands,"
etc.
-
Drawing and Labeling Body Parts:
Teacher gives students a
simple outline of a person or asks them to draw one. Students then
label the body parts they know in English.
Teacher can provide a word bank on the
board.
-
Worksheet Activity: Teacher can provide a worksheet with
pictures of different body parts. Students can write the correct
English word under each picture.
IV. Preparation for the Next Stage (5
minutes)
-
Review: Briefly review all the body
part words learned in both lessons.
-
Preview of Future
Lessons: "In our next lessons, we will
learn about clothes we wear on different parts of our
body."
-
Homework
(Optional): "Draw a picture of yourself
and label as many body parts as you can in
English."
V. Conclusion (5
minutes)
-
"Body Part
Story": Teacher tells a short, simple
story, incorporating the body part words (e.g., "The little girl
touched her head and then her shoulders. She wiggled her toes and
blinked her eyes."). Students can act out the story as they hear
it.
-
Positive
Reinforcement: "Excellent work learning more
about your body today! You know so many body parts in English
now."
|
Performs
exercises
Performs exercises
Performs text-related tasks
Performs text-related tasks
Performs text-related tasks
Performs text-related tasks
Performs exercises
Performs text-related tasks
|
Using the thumb method
The "wonderful,
good, wonderful" method
Through a
traffic light
The "wonderful,
good, wonderful" method
Through a
traffic light
The "wonderful,
good, wonderful" method
|
|
|
End of lesson
5 min
|

|
Creates feedback
|
|
|
Short-term plan 23-24
|
Teacher name:
|
|
|
Date:
|
|
|
Grade:
|
|
Number present:
|
absent:
|
|
Theme of the lesson
|
Home and Rooms
|
|
Lesson objectives
|
- Introduce home-related vocabulary (kitchen,
bedroom, living room)
Practice describing one’s home
environment
|
Lessonaction
|
Lessonperiod / time
|
Teacher's action
|
Studentaction
|
Evaluation
|
Resources
|
|
The beginning of the
lesson
10 min
|
Greeting learners.
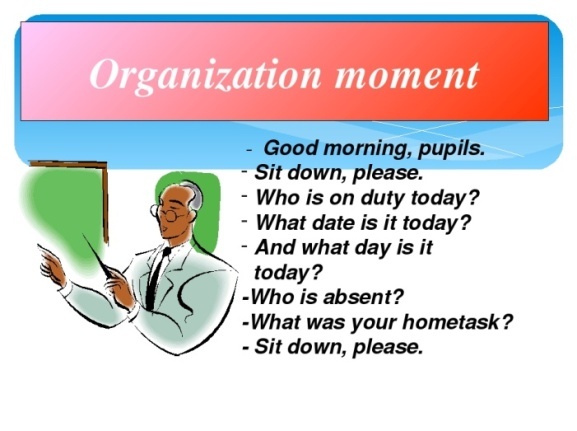
|
-
the mood will rise
-
will be ready for the lesson. answer
questions
-
|
The method of "verbal
encouragement"
|
|
|
|
Lesson 23: Rooms in a House
I. Organizational Stage (5
minutes)
-
Greeting and
Review: "Hello everyone! How are you
today?" (Briefly review parts of the body if
appropriate).
-
Checking
Attendance: Briefly take
attendance.
-
Lesson Topic
Introduction: "Today, we are going to learn
the names of different rooms in a house in
English."
-
Lesson
Objectives: "By the end of this lesson,
you will be able to recognize and say the English words for
kitchen, bedroom, living room, and bathroom, and describe a simple
feature of one of these rooms."
II. Introducing New Material (20
minutes)
-
Introducing
"Kitchen":
-
Teacher shows a picture of a
kitchen and says, "This is a kitchen."
Writes "kitchen" on the board. Students
repeat.
-
Teacher can ask, "What do we do in the kitchen?"
(Accept answers in their native language initially, then try to
elicit "eat," "cook" later if possible).
-
Introducing
"Bedroom":
-
Teacher shows a picture of a
bedroom and says, "This is a bedroom."
Writes "bedroom" on the board. Students
repeat.
-
Teacher asks, "What do you have in your bedroom?"
(Accept answers in their native language initially, aiming for
"bed" later).
-
Introducing "Living
Room":
-
Teacher shows a picture of a
living room and says, "This is a living
room." Writes "living room" on the board. Students
repeat.
-
Teacher asks, "What do you do in the living
room?" (Accept initial answers in their native language, aiming for
"watch TV," "sit" later).
-
Introducing
"Bathroom":
-
Teacher shows a picture of a
bathroom and says, "This is a
bathroom." Writes "bathroom" on the board. Students
repeat.
-
Teacher asks, "What do you do in the bathroom?"
(Accept initial answers, aiming for "wash," "shower"
later).
-
Pronunciation Practice: Teacher repeats each room name, and
students repeat in chorus and
individually.
-
Describing One's Home ("My bedroom has a
bed"):
-
Teacher shows the picture of a bedroom again and
says, "My bedroom has a bed." Writes "My bedroom has a bed" on the
board. Students repeat.
-
Teacher can encourage students to say, "My [room]
has a [common item in that room]" using the vocabulary they know or
even in their native language if they don't know the English word
yet (teacher can then provide the English word). Examples: "My
kitchen has a table," "My living room has a
sofa."
III. Activities (15
minutes)
-
"Room Flashcards": Teacher shows flashcards with pictures
of the different rooms. Students say the English name of the
room.
-
"Where is it?" Game: Teacher says an activity (e.g., "We
sleep here"), and students say the room where that activity usually
happens (bedroom).
-
"Room Matching": Teacher can prepare simple worksheets
with pictures of activities or objects on one side and the room
names on the other. Students draw lines to match. Example: picture
of a bed - bedroom, picture of a stove -
kitchen.
-
Drawing a Room: Teacher asks students to draw their
favorite room in their house and label it with the English
name.
IV. Preparation for the Next Stage (5
minutes)
-
Review: Briefly review all the room
names learned in the lesson.
-
Preview of Next
Lesson: "In our next lesson, we will
learn how to say where things are in a room using words like 'in,'
'on,' and 'under'."
-
Homework
(Optional): "Try to say the English names
of the rooms in your house."
V. Conclusion (5
minutes)
-
"Room Guessing
Game": Teacher describes a room
(e.g., "We cook food in this room"), and students guess the room in
English.
-
Positive
Reinforcement: "Excellent work learning about
rooms in a house today! You know many new
words."
Lesson 24: Describing Home and Location
Prepositions
I. Organizational
Stage (5 minutes)
-
Greeting and
Review: "Hello everyone! How are you
today?" (Briefly review the names of the rooms from the previous
lesson).
-
Checking
Attendance: Briefly take
attendance.
-
Lesson Topic
Introduction: "Today, we are going to learn
how to say where things are in our house using English
words."
-
Lesson
Objectives: "By the end of this lesson,
you will be able to use the prepositions 'in,' 'on,' and 'under' to
describe the location of objects in different
rooms."
II. Introducing New Material (20
minutes)
-
Review of Rooms: Quickly review kitchen, bedroom,
living room, and bathroom using flashcards or by asking
students.
-
Introducing
Preposition "In":
-
Teacher holds a pencil and
puts it in a box. Says, "The pencil is in
the box." Writes "in" on the board. Students
repeat.
-
Teacher can ask, "What is in your bag?" (Students
can show and say "A book is in my bag," etc.).
-
Introducing
Preposition "On":
-
Teacher places a
book on the desk. Says, "The book is
on the desk." Writes "on" on the board. Students
repeat.
-
Teacher can ask, "What is on your desk?"
(Students can show and say "A pencil is on my desk,"
etc.).
-
Introducing
Preposition "Under":
-
Teacher puts a
ruler under the chair. Says, "The ruler is
under the chair." Writes "under" on the board. Students
repeat.
-
Teacher can ask, "What is under your chair?"
(Students can look and answer).
-
Combining Rooms and
Prepositions:
-
Teacher shows a picture of a
bedroom with a book on the bed. Says, "The book is on the bed in
the bedroom." Writes it on the board. Students
repeat.
-
Teacher gives more examples using different rooms
and objects (e.g., "The soup is in the bowl in the kitchen," "The
toy is under the sofa in the living room").
III. Activities (15
minutes)
-
"Where is the...?" Game (Using Real
Objects): Teacher places familiar objects (pencil, book, ruler) in
different locations (in a bag, on a desk, under a chair) and asks,
"Where is the [object]?" Students answer using the
prepositions.
-
"Picture Description": Teacher shows pictures of rooms with
objects in different places. Students describe the location of the
objects using the prepositions and room names (e.g., "The ball is
under the table in the living
room.").
-
"Mini House Model" Activity
(Optional): If a toy house or even just drawings
of rooms are available, teacher can place small objects in
different locations within the house/rooms and ask students to
describe where they are.
-
Worksheet Activity: Teacher can provide a worksheet with
pictures of objects in different rooms and ask students to write
sentences describing their location using "in," "on," and
"under."
IV. Preparation for the Next Stage (5
minutes)
-
Review: Briefly review the
prepositions "in," "on," and "under" and the room
names.
-
Preview of Future
Lessons: "In our next lessons, we will
learn about clothes and how to talk about what we are
wearing."
-
Homework
(Optional): "Look around your house and
try to describe where different things are using 'in,' 'on,' and
'under'."
V. Conclusion (5
minutes)
-
"Hidden Object
Game": Teacher hides a small object
in the classroom (e.g., under a book, on a shelf, in a box) and
gives clues using the prepositions and classroom object
vocabulary. Students try to guess where the object
is.
-
Positive
Reinforcement: "Excellent work learning about
prepositions and describing locations today! You are becoming very
good at describing things in
English."
|
Performs
exercises
Performs exercises
Performs text-related tasks
Performs text-related tasks
Performs text-related tasks
Performs text-related tasks
Performs exercises
|
Using the thumb method
The "wonderful,
good, wonderful" method
Through a
traffic light
The "wonderful,
good, wonderful" method
Through a
traffic light
|
|
|
End of lesson
5 min
|
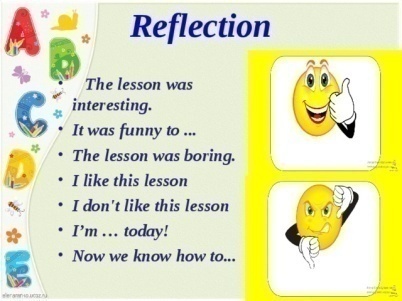
|
Creates feedback
|
|
|
Short-term plan 25-26
|
Teacher name:
|
|
|
Date:
|
|
|
Grade:
|
|
Number present:
|
absent:
|
|
Theme of the lesson
|
Clothing and
Shopping
|
|
Lesson objectives
|
- Teach clothing vocabulary (shirt, pants,
shoes)
Practice shopping dialogues (“How
much is it?”)
|
Lessonaction
|
Lessonperiod / time
|
Teacher's action
|
Studentaction
|
Evaluation
|
Resources
|
|
The beginning of the
lesson
10 min
|
Greeting learners.
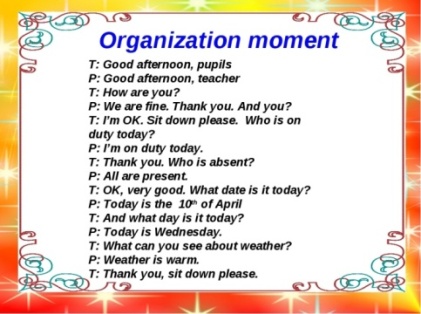
|
-
the mood will rise
-
will be ready for the lesson. answer
questions
-
|
The method of "verbal
encouragement"
|
|
|
|
Lesson 25: Clothing Items
I. Organizational Stage (5
minutes)
-
Greeting and
Review: "Hello everyone! How are you
today?" (Briefly review rooms in a house and prepositions if
appropriate).
-
Checking
Attendance: Briefly take
attendance.
-
Lesson Topic
Introduction: "Today, we are going to learn
the names of some clothes we wear in
English."
-
Lesson
Objectives: "By the end of this lesson,
you will be able to recognize and say the English words for shirt,
pants, shoes, hat, and coat, and describe what you or someone else
is wearing."
II. Introducing New Material (20
minutes)
-
Introducing
"Shirt":
-
Teacher points to their shirt
(or holds up a shirt) and says, "This is a
shirt." Writes "shirt" on the board. Students
repeat.
-
Teacher can ask, "What color is my
shirt?"
-
Introducing
"Pants":
-
Teacher points to their pants
(or holds up a pair of pants) and says, "These are
pants." Writes "pants" on the board. Students
repeat.
-
Teacher can ask, "What color are your
pants?"
-
Introducing
"Shoes":
-
Teacher points to their shoes
(or holds up a pair of shoes) and says, "These are
shoes." Writes "shoes" on the board. Students
repeat.
-
Teacher can ask, "What color are your
shoes?"
-
Introducing
"Hat":
-
Teacher holds up a hat (or
pretends to put one on) and says, "This is a
hat." Writes "hat" on the board. Students
repeat.
-
Teacher can ask, "Do you wear a hat when it's
cold?" (Considering the time of year).
-
Introducing
"Coat":
-
Teacher pretends to put on a
coat (or holds up a coat) and says, "This is a
coat." Writes "coat" on the board. Students
repeat.
-
Teacher can ask, "Do you wear a coat when it's
cold?"
-
Describing What You Wear ("I'm
wearing..."):
-
Teacher points to their shirt and says, "I'm
wearing a [color] shirt." Writes "I'm wearing a [color] shirt" on
the board. Students repeat.
-
Teacher encourages students to describe what they
are wearing using the same sentence structure.
-
Describing What Someone Else Wears ("He/She is
wearing..."):
-
Teacher points to a student
wearing a particular item and says, "He/She is wearing [color]
[clothing item]." Writes "He/She is wearing [color] [clothing
item]" on the board. Students repeat.
-
Students can take turns describing what their
classmates are wearing.
III. Activities (15
minutes)
-
"Touch Your..." (Clothing):
Teacher says, "Touch your
shirt," "Touch your pants," etc., and students touch the correct
item of clothing they are wearing.
-
"Clothing Flashcards": Teacher shows flashcards with pictures
of the clothing items. Students
say the English name.
-
"What are they wearing?" Game:
Teacher shows pictures of
people wearing different clothes. Students describe what the people
are wearing using the sentence structures
learned.
-
"Dress Up" Activity (Optional):
If available, teacher can
have a bag of clothes (real or toy clothes) and ask students to
pick an item and say what it is in English and what color it
is.
IV. Preparation for the Next Stage (5
minutes)
-
Review: Briefly review all the
clothing items learned in the lesson and the sentence structures
for describing what someone is
wearing.
-
Preview of Next
Lesson: "In our next lesson, we will
learn how to talk about buying clothes in a
shop."
-
Homework
(Optional): "Draw a picture of yourself
wearing your favorite clothes and label them with their English
names."
V. Conclusion (5
minutes)
-
"Clothing Simon
Says": Teacher plays "Simon Says"
using the clothing items (e.g., "Simon says, touch your
shoes.").
-
Positive
Reinforcement: "Excellent work learning about
clothes today! You can now name many items of clothing in
English."
Lesson 26: Shopping Dialogue and
Role-Play
I. Organizational
Stage (5 minutes)
-
Greeting and
Review: "Hello everyone! How are you
today?" (Briefly review clothing items from the previous
lesson).
-
Checking
Attendance: Briefly take
attendance.
-
Lesson Topic
Introduction: "Today, we are going to learn
how to talk about buying clothes in a shop in
English."
-
Lesson
Objectives: "By the end of this lesson,
you will be able to understand and use the basic shopping dialogue
'How much is it?' and 'It's [price],' and role-play a simple store
scenario."
II. Introducing New Material (20
minutes)
-
Review of Clothing Items:
Quickly review shirt,
pants, shoes, hat, and coat using flashcards or by asking
students.
-
Introducing the Question "How much is
it?":
-
Teacher holds up a flashcard of a shirt and says,
"How much is it?" Writes "How much is it?" on the board. Students
repeat.
-
Teacher explains that this question is used to
ask about the price of something.
-
Introducing the Answer "It's
[price].":
-
Teacher answers their own
question, "It's [say a number] tenge." (Using the local currency).
Writes "It's [number] tenge" on the
board. Students repeat.
-
Teacher can use simple numbers they have already
learned (e.g., one, five, ten, twenty).
-
Practicing the Dialogue:
Teacher shows flashcards
of different clothing items and asks "How much is it?" Students
answer with "It's [a number] tenge." Teacher can write different
prices on the board for reference.
-
Role-Play Scenario (Buyer and
Seller):
-
Teacher explains that they will practice a simple
shopping conversation.
-
Teacher takes the role of the seller and chooses
a student to be the buyer.
-
Teacher (Seller): "Hello, can I help
you?"
-
Student (Buyer): "Yes, please. How much is this
[holds up or points to a picture of a shirt]?"
-
Teacher (Seller): "It's five hundred
tenge."
-
Student (Buyer): "Okay, thank
you." (or
"I'll take it.")
-
Teacher can repeat this with different students
and different clothing items and prices.
III. Activities (15
minutes)
-
"Price Matching": Teacher can have pictures of clothing
items with price tags (using simple numbers) and ask students to
match the picture with the spoken
price.
-
"Shopping Dialogue Practice" (Pair
Work): Students work in pairs. One student is the buyer, and the
other is the seller. They take turns asking "How much is it?" and
answering with a price for different clothing items (they can use
flashcards or pretend).
-
Expanding the Dialogue (Optional):
If students are
comfortable, teacher can introduce simple phrases
like:
-
Creating a Mini Store: If possible, set up a small area in
the classroom with pictures or real examples of the clothing items.
Students can take turns being the buyer and seller and practice the
shopping dialogue.
IV. Preparation for the Next Stage (5
minutes)
-
Review: Briefly review the shopping
dialogue "How much is it?" and "It's
[price]."
-
Preview of Future
Lessons: "In our next lessons, we will
learn about colors and how to describe things using colors." (This
seems like a good next step, even though it was listed earlier, it
fits well here).
-
Homework
(Optional): "Pretend you are in a shop and
practice asking 'How much is it?' for different things you see at
home."
V. Conclusion (5
minutes)
-
Role-Play
Performance: A few pairs of students can
volunteer to perform their shopping role-play for the
class.
-
Positive
Reinforcement: "Excellent work practicing
shopping in English today! You all did a great job with the
dialogue."
|
Performs
exercises
Performs exercises
Performs text-related tasks
Performs text-related tasks
Performs text-related tasks
Performs text-related tasks
Performs exercises
|
Using the thumb method
The "wonderful,
good, wonderful" method
Through a
traffic light
The "wonderful,
good, wonderful" method
Through a
traffic light
|
|
|
End of lesson
5 min
|
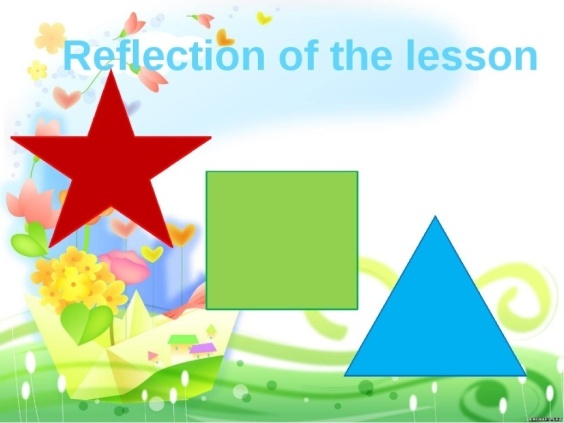
|
Creates feedback
|
|
|
Short-term plan 27-28
|
Teacher name:
|
|
|
Date:
|
|
|
Grade:
|
|
Number present:
|
absent:
|
|
Theme of the lesson
|
Simple
Storytelling
|
|
Lesson objectives
|
- Introduce a short story using
illustrations
Emphasize key vocabulary and basic
narrative structure
|
Lessonaction
|
Lessonperiod / time
|
Teacher's action
|
Studentaction
|
Evaluation
|
Resources
|
|
The beginning of the
lesson
10 min
|
Greeting learners.
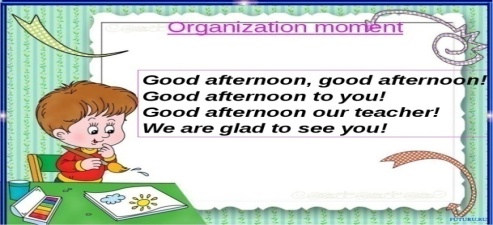
|
-
the mood will rise
-
will be ready for the lesson. answer
questions
-
|
The method of "verbal
encouragement"
|
|
|
|
Lesson 27: Introducing "The Very Hungry
Caterpillar"
I. Organizational
Stage (5 minutes)
-
Greeting and
Review: "Hello everyone! How are you
today?" (Briefly review clothing and shopping vocabulary if
appropriate).
-
Checking
Attendance: Briefly take
attendance.
-
Lesson Topic
Introduction: "Today, we are going to read a
very fun story in English! It's called 'The Very Hungry
Caterpillar'." (Show the book
cover).
-
Lesson
Objectives: "By the end of this lesson,
you will be able to recognize some key characters and the beginning
and middle parts of the story, and learn some new
words."
II. Introducing the Story and Key Vocabulary (20
minutes)
-
Introducing the
Main Character:
-
Show a picture of the
caterpillar from the book. Say, "This is a
caterpillar." Write "caterpillar" on the board. Students
repeat.
-
Say, "The caterpillar is very
hungry." Write "hungry" on the board.
Students repeat.
-
Introducing the Sequence Words "First" and
"Then":
-
Explain that stories often have a beginning,
middle, and end.
-
Say, "First, the caterpillar
was very small." (Show the relevant page). Write "first" on the
board. Students repeat.
-
Say, "Then, he ate a lot of
food." Write "then" on the board.
Students repeat.
-
Reading the Beginning of the Story (Pages with eating on
Monday to Friday):
-
Read the first part of the story aloud, showing
the pictures clearly. Focus on the days of the week (which they
have learned) and the food the caterpillar eats.
-
As
you read each food item, point to it and say the name clearly
(apple, pears, plums, strawberries, oranges). Write these words on
the board and have students repeat.
-
Checking
Comprehension (Beginning):
III. Activities (15
minutes)
-
Vocabulary Matching: Prepare simple worksheets with
pictures of the caterpillar, an apple, pears, plums, strawberries,
oranges, and the words next to them. Students draw lines to match
the words to the pictures.
-
"What did he eat?" Game (Days of the
Week): Teacher says a day of the week (Monday, Tuesday, Wednesday,
Thursday, Friday), and students try to remember and say what the
caterpillar ate on that day (using the pictures in the book as a
prompt if needed).
-
Picture Sequencing (Beginning):
Provide students with
simple drawings or printouts of the caterpillar eating the food on
Monday, Tuesday, and Wednesday. Ask them to put the pictures in the
correct order.
IV. Preparation for the Next Stage (5
minutes)
-
Review: Briefly review the character
(caterpillar), the feelings (hungry), the sequence words (first,
then), and the food items learned.
-
Preview of Next
Lesson: "In our next lesson, we will
finish the story and find out what happens to the very hungry
caterpillar!"
-
Homework
(Optional): "Try to remember the foods the
caterpillar ate in the first part of the
story."
V. Conclusion (5
minutes)
-
Sing a Song about Days of the
Week: Reinforce the days of the week
that were prominent in the first part of the
story.
-
Positive
Reinforcement: "Excellent listening today!
You learned a lot about the very hungry
caterpillar."
Lesson 28: Completing and Retelling "The Very
Hungry Caterpillar"
I. Organizational
Stage (5 minutes)
-
Greeting and
Review: "Hello everyone! How are you
today?" (Briefly review the character and the beginning of the
story from the previous lesson).
-
Checking
Attendance: Briefly take
attendance.
-
Lesson Topic
Introduction: "Today, we are going to finish
the story of 'The Very Hungry Caterpillar' and learn how to tell
the story ourselves!"
-
Lesson
Objectives: "By the end of this lesson,
you will be able to understand the end of the story, learn the
sequence words 'finally' and 'in the end,' and retell the story in
a simple way."
II. Completing the Story and Introducing New Vocabulary (20
minutes)
-
Review of Previous Vocabulary:
Quickly review
caterpillar, hungry, first, then, and the food items from Monday to
Friday.
-
Reading the Middle and End of the Story (Saturday and
Sunday):
-
Read the pages about Saturday, emphasizing the
large amount of food the caterpillar eats. Introduce new food words
(chocolate cake, ice cream cone, pickle, Swiss cheese, salami,
lollipop, cherry pie, sausage, cupcake, watermelon). You don't need
to focus on memorizing all of these, but point to the pictures and
say the names.
-
Read the part about Sunday where the caterpillar
eats a green leaf and feels better.
-
Read the final pages where the caterpillar makes
a cocoon and then becomes a beautiful butterfly.
-
Introducing Sequence Words "Finally" and "In the
End":
-
Say, "Finally, the caterpillar
made a cocoon." (Show the page). Write "finally" on the
board. Students repeat.
-
Say, "In the end, he became a
beautiful butterfly." (Show the last page). Write "in the end" on
the board. Students repeat.
-
Introducing
"Cocoon" and "Butterfly":
-
Show the picture of the cocoon
and say, "This is a cocoon." Write "cocoon" on the
board. Students repeat.
-
Show the picture of the
butterfly and say, "This is a
butterfly." Write "butterfly" on the board. Students
repeat.
III. Activities (15
minutes)
-
Picture Sequencing (Full Story):
Provide students with a
set of pictures representing key events from the entire story
(caterpillar, eating different foods in order, cocoon, butterfly).
Ask them to put the pictures in the correct
sequence.
-
Guided
Retelling:
-
Teacher asks: "What happened first?" (The
caterpillar was small and hungry).
-
Teacher asks: "Then what did he do on Monday?"
(He ate one apple). Continue for a few days, prompting with "Then
what happened?"
-
Teacher asks: "What happened on Saturday?" (He
ate a lot of different foods).
-
Teacher asks: "Then what happened on Sunday?" (He
ate a green leaf).
-
Teacher asks: "Finally, what
did he do?" (He made a cocoon).
-
Teacher asks: "In the end,
what did he become?" (He became a butterfly).
-
Simple
Comprehension Questions:
-
Was the caterpillar always
big? (No).
-
Did the caterpillar eat a
little food or a lot of food?
(A
lot of food).
-
What did the caterpillar
become at the end? (A butterfly).
IV. Preparation for the Next Stage (5
minutes)
-
Review: Briefly review the sequence of
the story and the new vocabulary (finally, in the end, cocoon,
butterfly).
-
Preview of Future
Lessons: "In our next lessons, we will
learn about colors again and how to describe the
butterfly."
-
Homework
(Optional): "Try to tell the story of 'The
Very Hungry Caterpillar' to someone at home in English or your own
language."
V. Conclusion (5
minutes)
-
Act Out the Story (Simple
Version): Students can act out the story
using simple actions (pretending to eat, making a cocoon shape,
flapping arms like a butterfly).
-
Positive
Reinforcement: "Fantastic storytelling today!
You all learned so much about the very hungry caterpillar and how
to tell a story in English."
|
Performs
exercises
Performs exercises
Performs text-related tasks
Performs text-related tasks
Performs text-related tasks
Performs text-related tasks
Performs exercises
|
Using the thumb method
The "wonderful,
good, wonderful" method
Through a
traffic light
The "wonderful,
good, wonderful" method
Through a
traffic light
|
|
|
End of lesson
5 min
|

|
Creates feedback
|
|
|
Short-term plan-29-30
|
Teacher name:
|
|
|
Date:
|
|
|
Grade:
|
|
Number present:
|
absent:
|
|
Theme of the lesson
|
Basic Grammar
Consolidation
|
|
Lesson objectives
|
- Review essential grammar points (pronouns,
simple present tense, prepositions)
Interactive exercises
(fill-in-the-blanks, quizzes)
|
Lessonaction
|
Lessonperiod / time
|
Teacher's action
|
Studentaction
|
Evaluation
|
Resources
|
|
The beginning of the
lesson
10 min
|
Greeting learners.

|
-
the mood will rise
-
will be ready for the lesson. answer
questions
-
|
The method of "verbal
encouragement"
|
|
|
|
Lesson 29: Grammar Review and Practice (Part
1)
I. Organizational
Stage (5 minutes)
-
Greeting and
Review: "Hello everyone! How are you
today?" (Briefly review a favorite topic from the past few
lessons).
-
Checking
Attendance: Briefly take
attendance.
-
Lesson Topic
Introduction: "Today, we are going to review
some of the important grammar we have learned in English so
far. This will help us become even better
speakers!"
-
Lesson
Objectives: "By the end of this lesson,
you will be able to remember and use the present simple tense for
routines (with 'I'), the 'I have...' structure, and identify and
correct some common mistakes."
II. Reviewing Core Structures (15
minutes)
-
Present Simple (for "I"
routines):
-
Teacher says examples of daily
routines: "I wake up at 7 o'clock.
I
eat breakfast. I go to school."
-
Teacher writes the sentence structure on the
board: "I + verb (base form)."
-
Teacher asks students to give examples of their
own routines using this structure.
-
"I have..."
Structure:
-
Teacher says examples related
to body parts or possessions: "I have two
eyes. I
have a book."
-
Teacher writes the sentence structure on the
board: "I have + noun."
-
Teacher asks students to give examples using this
structure.
-
Common Mistakes: Teacher briefly mentions common errors
students might make (e.g., forgetting the "s" for third person
singular - though this lesson focuses on "I," it's good to gently
remind them for future learning; using the wrong verb form). For "I
have," common mistakes might be "I has" or incorrect
pluralization.
III. Practice
Exercises (20 minutes)
-
Fill-in-the-Blanks (Present Simple):
Teacher provides sentences
with missing verbs related to daily routines. Students fill in the
blanks with the correct verb form.
-
Matching (Present Simple):
Teacher provides two
columns. One with subjects ("I") and time expressions, and the
other with verbs and objects. Students match them to form correct
sentences.
-
Example:
-
I | go to bed
-
every day | eat dinner
-
at night | watch TV
-
Fill-in-the-Blanks ("I have..."):
Teacher provides sentences
with missing nouns. Students fill in the blanks with appropriate
nouns related to body parts or classroom
objects.
-
Matching ("I have..."): Teacher provides two columns. One with
"I have" and numbers, the other with plural nouns.
Students match them
correctly.
-
Example:
-
I have two | hands
-
I have one | nose
IV. Identifying and Correcting Mistakes (5
minutes)
-
Teacher writes a few sentences on the board with
common mistakes related to the reviewed
structures.
-
Example: I goes to school. (Correct: I go to
school.)
-
Example: I has two ear. (Correct: I have two
ears.)
-
Teacher asks students to identify the mistake and
correct the sentence.
V. Conclusion (5
minutes)
-
Short Q&A (Present
Simple): Teacher asks simple questions
about routines: "What time do you wake up?" "What do you do after
school?" Students answer using the present
simple.
-
Short Q&A ("I
have..."): Teacher asks simple questions:
"How many brothers do you have?" "Do you have a pet?" Students
answer using "I have..." or "I don't
have..."
-
Positive
Reinforcement: "Excellent work reviewing your
grammar today! You remembered many important
things."
Lesson 30: Grammar Review and Practice (Part
2)
I. Organizational
Stage (5 minutes)
-
Greeting and
Review: "Hello everyone! How are you
today?" (Briefly review the grammar points from the previous
lesson).
-
Checking
Attendance: Briefly take
attendance.
-
Lesson Topic
Introduction: "Today, we will continue
reviewing our grammar, focusing on prepositions and asking
questions in English."
-
Lesson
Objectives: "By the end of this lesson,
you will be able to use the prepositions 'in,' 'on,' and 'under'
correctly, form simple questions using 'What is...?', 'Do you
have...?', and 'How many...?', and reinforce your accuracy through
group activities."
II. Reviewing Core Structures (15
minutes)
-
Basic Prepositions (in, on,
under):
-
Teacher shows examples using objects in the
classroom: "The book is on the desk. The pencil is in the box. The
bag is under the chair."
-
Teacher writes the prepositions on the board and
asks students to give their own examples using classroom
objects.
-
Question
Forms:
-
"What
is...?": Teacher holds up an object
and asks, "What is this?" (It's a book). Teacher writes the
question form on the board.
-
"Do you
have...?": Teacher asks, "Do you have a
sister?" (Yes, I do./No, I don't.).
Teacher writes the question form on the
board.
-
"How
many...?": Teacher asks, "How many
pencils do you have?" (I have three pencils.). Teacher writes the
question form on the board.
-
Common Mistakes: Teacher briefly mentions common errors
with prepositions (e.g., using the wrong preposition) and question
forms (e.g., incorrect word order, missing auxiliary verbs - though
focusing on simple forms here).
III. Practice
Exercises (20 minutes)
-
Matching (Prepositions):
Teacher provides pictures
of objects in different locations and sentences with missing
prepositions. Students match
the pictures to the correct sentences.
-
Short Q&A (Prepositions):
Teacher asks questions
about the location of objects in the classroom: "Where is the
board?" "Where is your book?" Students answer using "in," "on," or
"under."
-
Matching (Question Forms):
Teacher provides questions
and possible answers. Students
match the questions to the appropriate
answers.
-
Example:
-
What is your name? | I have one
brother.
-
Do you have a
brother? | It's a pencil.
-
How
many friends do you have? | My name is [student's
name].
-
Short Q&A (Question Forms):
Teacher asks students
questions using the reviewed question forms.
Students provide short
answers.
IV. Group Drills or Quiz (5
minutes)
-
Group Drill: Teacher calls out a structure or a
question, and the whole class responds in
chorus.
-
Teacher: "I wake up
at..." Class: "[a time]"
-
Teacher: "Do you have a cat?" Class: "Yes, I do."
or "No, I don't."
-
Teacher: "Where is the pen?" Class: "It's on the
desk."
-
Simple Quiz (Optional): Teacher can give a very short, simple
quiz with a few fill-in-the-blank or matching questions covering
all the reviewed grammar points from both lessons. This can be done
orally or with a quick written
activity.
V. Conclusion (5
minutes)
-
Error Correction
Activity: Teacher writes a few more
sentences with common errors on the board and asks students to work
together to correct them.
-
Positive
Reinforcement: "Fantastic job reviewing your
grammar over the last two lessons!
You
are all improving your English skills very
well."
-
Future
Learning: Briefly mention that they will
continue to build on these grammar foundations in future
lessons.
|
Performs
exercises
Performs exercises
Performs text-related tasks
Performs text-related tasks
Performs text-related tasks
Performs text-related tasks
Performs exercises
|
Using the thumb method
The "wonderful,
good, wonderful" method
Through a
traffic light
The "wonderful,
good, wonderful" method
Through a
traffic light
|
|
|
End of lesson
5 min
|

|
Creates feedback
|
|
|
Short-term plan-31-32
|
Teacher name:
|
|
|
Date:
|
|
|
Grade:
|
|
Number present:
|
absent:
|
|
Theme of the lesson
|
Fun Review and Group
Projects
|
|
Lesson objectives
|
- Engage students in small group projects
(posters, skits, presentations)
Recap topics from previous lessons
in a creative format
|
Lessonaction
|
Lessonperiod / time
|
Teacher's action
|
Studentaction
|
Evaluation
|
Resources
|
|
The beginning of the
lesson
10 min
|
Greeting learners.
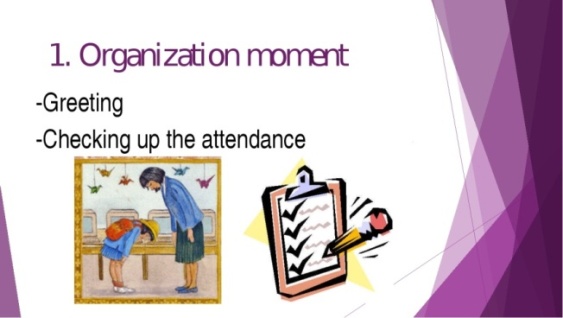
|
-
the mood will rise
-
will be ready for the lesson. answer
questions
-
|
The method of "verbal
encouragement"
|
|
|
|
Lesson 31: Collaborative Review
Activities
I. Organizational Stage (5
minutes)
-
Greeting and
Review: "Hello everyone! How are you
today? We've learned so much English
together!"
-
Checking
Attendance: Briefly take
attendance.
-
Lesson Topic
Introduction: "For our last two lessons, we
are going to have some fun reviewing everything we've learned
through exciting group activities and
projects!"
-
Lesson
Objectives: "By the end of this lesson,
you will be able to work together in groups to revisit previous
topics, prepare a short activity or presentation, and play
interactive review games."
II. Collaborative Review and Project Preparation (25
minutes)
-
Group Formation: Divide the students into small groups
of 3-4.
-
Topic Assignment: Assign each group 2-3 topics that have
been covered in the previous lessons. You can either assign
specific topics or let the groups choose from a list on the
board. Examples of
topics:
-
Colors and Shapes
-
Numbers and Counting
-
Family and Friends
-
Classroom Objects and Commands
-
Days of the Week and Daily
Routines
-
Weather and Seasons
-
Animals and Nature
-
Food and Drinks
-
Parts of the Body
-
Home and Rooms
-
Clothing and Shopping
-
Simple Storytelling
-
Basic Grammar (present simple "I", "I have",
prepositions, questions)
-
Project Brainstorming: Instruct each group to brainstorm how
they can present or create an activity to review their assigned
topics for the class. Encourage
creativity! Here are some ideas:
-
Poster: Create a colorful poster with
vocabulary and pictures related to their
topics.
-
Short
Skit: Write and practice a short
dialogue or role-play incorporating vocabulary and phrases from
their topics.
-
Simple
Presentation: Prepare a short presentation
(using drawings or gestures if needed) to teach the class about
their topics.
-
Interactive
Game: Design a simple game (like
matching, pointing, or a simple quiz) to test the class on their
topics.
-
Initial Planning: Give the groups time to discuss their
ideas, assign roles within the group, and start planning their
project. Encourage them to think about the key vocabulary, grammar,
and phrases they want to include.
III. Interactive Review Games (15
minutes)
-
Vocabulary Chain: Start by saying a word from one of the
topics (e.g., "red"). The next student says a word related to
another topic (e.g., "cat"). Continue around the class, with each
student saying a word from a different topic we've learned. If
someone repeats a topic or can't think of a word, they are out
(optional - can just continue for
fun).
-
Grammar Charades: Write simple sentences or phrases on
slips of paper focusing on the reviewed grammar structures (e.g.,
"I eat breakfast," "The book is on the desk," "Do you have a
brother?"). Students take turns acting out the sentences for the
class to guess.
-
"Two Truths and a Lie"
(Vocabulary/Phrases): Each student thinks of three sentences
related to different topics – two true and one false. They say the
three sentences, and the class guesses which one is a
lie.
IV. Preparation for the Next Lesson (5
minutes)
-
Project Work
Time: Remind students that they will
have more time in the next lesson to finalize and present their
projects. Encourage them to think about any materials they might
need.
-
Homework
(Optional): Students can work on their
group projects at home if they
wish.
V. Conclusion (5
minutes)
-
Share
Progress: Briefly ask each group to
share one idea they have for their
project.
-
Positive
Reinforcement: "Fantastic teamwork today! I
can see you all have great ideas for reviewing our
English."
Lesson 32: Group Project Presentations and Fun
Games
I. Organizational
Stage (5 minutes)
-
Greeting and
Review: "Hello everyone! Welcome to
our final lesson of fun review!"
-
Checking
Attendance: Briefly take
attendance.
-
Lesson Topic
Introduction: "Today, we are going to see
all the amazing things you have learned by watching your group
projects and playing some more fun
games!"
-
Lesson
Objectives: "By the end of this lesson,
you will be able to present your group project, participate in
interactive review games, and celebrate your progress in learning
English."
II. Group Project Presentations (25
minutes)
-
Presentation Order: Decide on an order for the groups to
present their projects.
-
Group Presentations: Allow each group to present their
poster, skit, presentation, or lead their game. Encourage them to
speak clearly and use the English they have
learned.
-
Poster
Presentations: Groups can explain their
poster and point to the different
elements.
-
Short
Skits: Groups perform their dialogues
or role-plays.
-
Simple
Presentations: Groups share what they have
prepared to teach the class.
-
Interactive
Games: Groups lead the class in
playing their designed game.
-
Positive Feedback: After each presentation, encourage the
class to give positive feedback (e.g., "That was great!", "I liked
your poster!", "Good job speaking English!").
Teacher can also provide specific
praise.
III. Interactive Review Games (15
minutes)
-
"Pictionary" (Vocabulary Review):
Divide the class into two
teams. Draw words or simple phrases from different topics on slips
of paper. Students from each team take turns drawing the
word/phrase on the board while their team members
guess.
-
"Jeopardy" (Vocabulary, Grammar,
Phrases): Create a simple Jeopardy game with categories based on the
topics learned. Prepare questions of varying difficulty for each
category. Teams take turns choosing a category and point value, and
answering the question.
-
"Hot Potato" (Vocabulary/Quick
Questions): Play music while students pass around
a "hot potato" (any small object). When the music stops, the
student holding the potato has to answer a quick vocabulary
question or a simple grammar question related to any of the topics
learned.
IV. Wrap-up and Celebration (5
minutes)
-
Class
Discussion: Briefly discuss what the
students enjoyed learning the most throughout the
lessons.
-
Positive Reinforcement and
Encouragement: Congratulate the students on
their hard work and progress in learning
English. Remind them of how much they have
learned.
-
Future
Learning: Encourage them to continue
practicing their English.
V. Conclusion (5
minutes)
-
Award Certificates
(Optional): If possible, hand out simple
certificates of completion or
participation.
-
Final
Farewell: Say goodbye to the students
and wish them well in their future English learning journey. "You
all did an amazing job! Keep practicing your
English!"
|
Performs
exercises
Performs exercises
Performs text-related tasks
Performs text-related tasks
Performs text-related tasks
Performs text-related tasks
Performs exercises
|
Using the thumb method
The "wonderful,
good, wonderful" method
Through a
traffic light
The "wonderful,
good, wonderful" method
Through a
traffic light
|
|
|
End of lesson
5 min
|
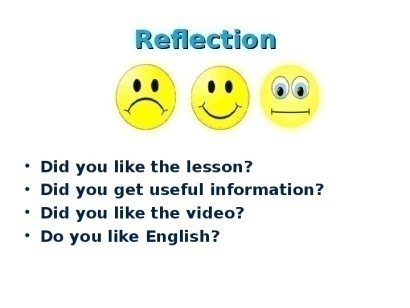
|
Creates feedback
|
|
|
Short-term plan-33-34
|
Teacher name:
|
|
|
Date:
|
|
|
Grade:
|
|
Number present:
|
absent:
|
|
Theme of the lesson
|
Assessment and
Culmination
|
|
Lesson objectives
|
- Conduct simple, friendly evaluations (oral
Q&A, matching tasks)
Summarize entire course and
celebrate achievements
|
Lessonaction
|
Lessonperiod / time
|
Teacher's action
|
Studentaction
|
Evaluation
|
Resources
|
|
The beginning of the
lesson
10 min
|
Greeting learners.

|
-
the mood will rise
-
will be ready for the lesson. answer
questions
-
|
The method of "verbal
encouragement"
|
|
|
|
Lesson 33: Friendly Evaluation
I. Organizational Stage (5
minutes)
-
Greeting and
Reassurance: "Hello everyone! Today, we are
going to do some fun activities to see how much English we have
learned together. Don't worry, it's not a test, just a friendly way
to check our progress!"
-
Checking
Attendance: Briefly take
attendance.
-
Lesson Topic
Introduction: "Today is all about
celebrating what we know and seeing how far we've come in our
English learning journey."
-
Lesson
Objectives: "By the end of this lesson,
you will be able to participate in friendly evaluation activities
that will show how much you have learned in vocabulary, grammar,
and basic phrases."
II. Low-Pressure Evaluation Activities (30
minutes)
-
Oral Questions
(Vocabulary):
-
Teacher shows flashcards or real objects and asks
simple "What is this?" questions covering various topics (colors,
shapes, numbers, animals, food, classroom objects, body parts,
clothes, rooms).
-
Teacher asks questions like
"What color is this?" "How many [object] are
there?" "What animal is this?"
-
Oral Questions
(Basic Phrases):
-
Short Written Task
(Fill-in-the-Blanks): Teacher provides simple sentences with
missing words (vocabulary or basic grammar).
Students fill in the
blanks.
-
Examples:
-
The apple is ________ (color).
-
I
have two ________ (body part).
-
This is a ________ (classroom
object).
-
I
________ (daily routine verb) at 7 o'clock.
-
Short Written Task (Simple
Sentences): Teacher asks students to write simple
sentences based on a prompt or
picture.
-
Picture Matching: Teacher provides a worksheet with
pictures on one side and words or short phrases on the other.
Students draw lines to match the pictures with the correct
English.
III. Review and Encouragement (10
minutes)
-
Review Answers (Oral and
Written): Briefly go over some of the
answers together as a class, providing positive reinforcement for
correct answers and gentle guidance for areas where students might
need more practice.
-
Highlight
Strengths: "You all remembered so many
words and phrases! I am very impressed with how much you have
learned."
IV. Preparation for the Next Lesson (5
minutes)
-
Preview: "In our next lesson, we will
talk about everything we have learned in our English class and
think about what we can do next to keep
learning."
V. Conclusion (5
minutes)
-
Positive
Feedback: "You all did a fantastic job
today! Remember, learning English is a journey, and you have taken
some amazing first steps."
Lesson 34: Course Summary, Feedback, and Future
Steps
I. Organizational
Stage (5 minutes)
-
Warm
Greeting: "Hello everyone! Welcome to
our final English class together for this
course. It's been wonderful learning with you
all!"
-
Checking
Attendance: Briefly take
attendance.
-
Lesson Topic
Introduction: "Today, we are going to look
back at everything we've learned, celebrate our progress, and talk
about how you can continue your English learning
journey."
-
Lesson
Objectives: "By the end of this lesson,
you will be able to recall the topics we have covered, understand
the progress you have made, receive feedback, and have ideas for
your next steps in learning
English."
II. Course Summary and Achievements (15
minutes)
-
Topic
Review: Go through a list of the main
topics covered throughout the 32 lessons (Colors and Shapes,
Numbers, Family, Classroom Objects, Days, Weather, Animals, Food,
Body Parts, Home, Clothing, Storytelling, Basic Grammar). You can
use visual aids or ask students to recall
topics.
-
Highlighting Key
Achievements: Emphasize the skills students
have gained, such as:
-
Naming many common objects and people in
English.
-
Counting and talking about
numbers.
-
Describing simple routines and the
weather.
-
Expressing likes and dislikes.
-
Asking basic questions and making polite
requests.
-
Understanding and retelling simple
stories.
-
Using basic grammar structures.
-
Positive
Anecdotes: Share some positive
observations or anecdotes about the students' progress and
participation throughout the
course.
III. Individual or Group Feedback (15
minutes)
-
Individual Feedback (If time
allows): If the class size is
manageable, you can spend a few minutes giving each student a
brief, positive comment on their
progress.
-
General Group
Feedback: Provide overall feedback to
the class, highlighting the strengths you observed and suggesting
general areas where they can continue to improve (e.g., "Continue
practicing speaking," "Try to watch English cartoons," "Keep
learning new words").
-
Focus on Effort and
Participation: Acknowledge the effort and
participation of all students, regardless of their
level.
IV. Discussing Next Steps in English Learning (10
minutes)
-
Encourage Continued
Learning: Emphasize the importance of
continuing to practice English.
-
Suggest
Resources: Provide suggestions for how
students can continue learning English in
Kazakhstan:
-
Online
Resources: Mention websites, apps, or
YouTube channels for learning
English.
-
English Clubs or
Groups: If available in the local
community, suggest joining English language clubs or
groups.
-
Using English in Daily
Life: Encourage them to try using
English words and phrases in their daily routines (e.g., naming
objects, counting).
-
Watching English Cartoons or
Movies (with subtitles):
Suggest this as a fun way to
improve listening skills.
-
Reading Simple English Books
or Comics: Encourage reading
age-appropriate English materials.
-
Set Small
Goals: Encourage students to set
small, achievable goals for their continued
learning.
V. Celebration and Farewell (5
minutes)
-
Celebrate
Progress: Applaud the students for their
hard work and celebrate the progress they have made. You can have a
small treat or activity to mark the end of the course
(optional).
-
Final Words of
Encouragement: Offer final words of
encouragement and express your hope that they will continue to
enjoy learning English.
-
Farewell: Say goodbye to the students
and wish them all the best in their future endeavors. "It has been
a pleasure teaching you! Keep up the great
work!"
|
Performs
exercises
Performs exercises
Performs text-related tasks
Performs text-related tasks
Performs text-related tasks
Performs text-related tasks
Performs exercises
|
Using the thumb method
The "wonderful,
good, wonderful" method
Through a
traffic light
The "wonderful,
good, wonderful" method
Through a
traffic light
|
|
|
End of lesson
5 min
|

|
Creates feedback
|
|
|
References
-
Cameron, L. (2001). Teaching Languages to Young
Learners. Cambridge University
Press.
-
Ellis, G., & Brewster, J.
(2014).
Tell It Again! The
Storytelling Handbook for Primary English Language
Teachers. British
Council.
-
Harmer, J. (2015). The Practice of English Language
Teaching (5th ed.). Pearson
Education.
-
Presents comprehensive teaching strategies,
lesson planning ideas, and insights into classroom management for
various age groups, including young learners.
-
Halliwell, S. (1992). Teaching English in the Primary
Classroom. Longman.
-
Linse, C. T. (2005). Practical English Language Teaching:
Young Learners. McGraw-Hill.
-
Focuses on core teaching principles for children,
offering lesson planning, classroom organization strategies, and
interactive activities.
-
Moon, J. (2000). Children Learning English: A Guidebook
for English Language Teachers. Macmillan.
-
Pinter, A. (2017). Teaching Young Language
Learners (2nd ed.). Oxford
University Press.
-
Explores key theories of child language
acquisition and offers practical methods for teaching grammar,
vocabulary, speaking, listening, reading, and
writing.
-
Shin, J. K., & Crandall, J.
(2014).
Teaching Young
Learners English: From Theory to
Practice. National Geographic
Learning.
-
Slattery, M., & Willis, J.
(2001).
English for Primary
Teachers: A Handbook of Activities and Classroom
Language. Oxford University
Press.
-
Tsagari, D., & Banerjee, J.
(Eds.).
(2016). Assessment and Learning in Content and Language Integrated
Learning (CLIL) Classrooms. Springer.
 ЖИ көмекші


 31 Наурыз 2025
 461
461

 Жүктеу


 Бұл курс Қазақстан Республикасы Оқу-ағарту министрлігімен келісілген